Since July 6, 2023, Atlassian has no longer been used for Release Notes or knowledge base articles.
* Find Release Notes here (https://support.mycontactcenter.net/app/articles/detail/a_id/23378/) and articles here (https://support.mycontactcenter.net/app/main).
* Authenticated Partners can access content here (https://support.mycontactcenter.net/cc/sso/authenticator/oauth/authorize/imcontrolpanel?redirect=main&source=mycontactcenter)
Data Collection Tab
- Jela Banovic (Deactivated)
- lauren_ellicott (Unlicensed)
- Former user (Deleted)
The Data Collection tab is used to define settings relating to collecting personal information from a customer (e.g. first name, last name, email address, etc.).
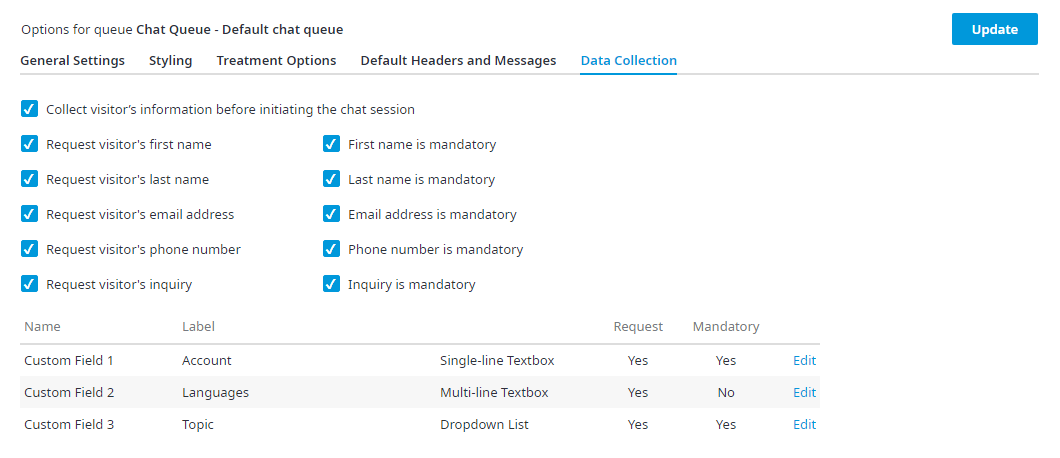
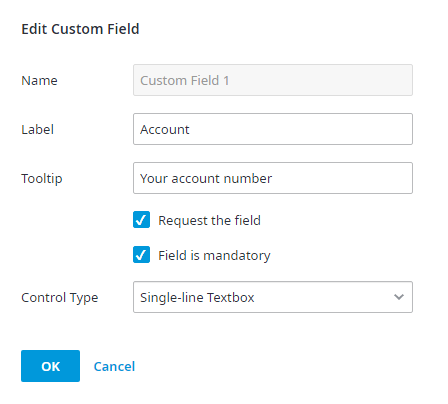
The first section of information are the standard information fields that can be requested from a customer when initiating a chat. You can select as many or as few of the options as you want. If you do not put a checkmark in the Collect visitor's information before initiating the chat session, no information fields will be presented to the customer. Optionally, if you wish to make the collection of any of the information fields mandatory for the customer to fill out, simply put a checkmark in the appropriate checkbox.
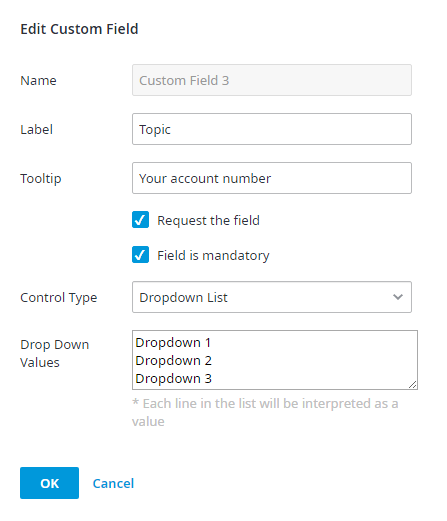
- Dropdown List - If you choose to provide the customers with a dropdown list of responses to choose from, the dialogue box will reload and you will be prompted to enter the dropdown list options in the Drop Down Values field.
To see how your chat will appear to customers, you can use the Reactive Chat URL found under the General Settings tab.
Related content
Since July 6, 2023, Atlassian has no longer been used for Release Notes or knowledge base articles.
* Find Release Notes here (https://support.mycontactcenter.net/app/articles/detail/a_id/23378/) and articles here (https://support.mycontactcenter.net/app/main).
* Authenticated Partners can access content here (https://support.mycontactcenter.net/cc/sso/authenticator/oauth/authorize/imcontrolpanel?redirect=main&source=mycontactcenter)