Since July 6, 2023, Atlassian has no longer been used for Release Notes or knowledge base articles.
* Find Release Notes here (https://support.mycontactcenter.net/app/articles/detail/a_id/23378/) and articles here (https://support.mycontactcenter.net/app/main).
* Authenticated Partners can access content here (https://support.mycontactcenter.net/cc/sso/authenticator/oauth/authorize/imcontrolpanel?redirect=main&source=mycontactcenter)
Configure Email Queues
- Jela Banovic (Deactivated)
- lauren_ellicott (Unlicensed)
- Former user (Deleted)
The Configure Email Queues allows you to configure how long emails are kept waiting in a particular email queue; time to live duration is measured in days. Each email queue can be configured with a different email time to live duration.
To configure how long emails are kept in an email queue:
- Navigate to the Queues page.
- Click Options, located to the right of the email queue you wish to configure.
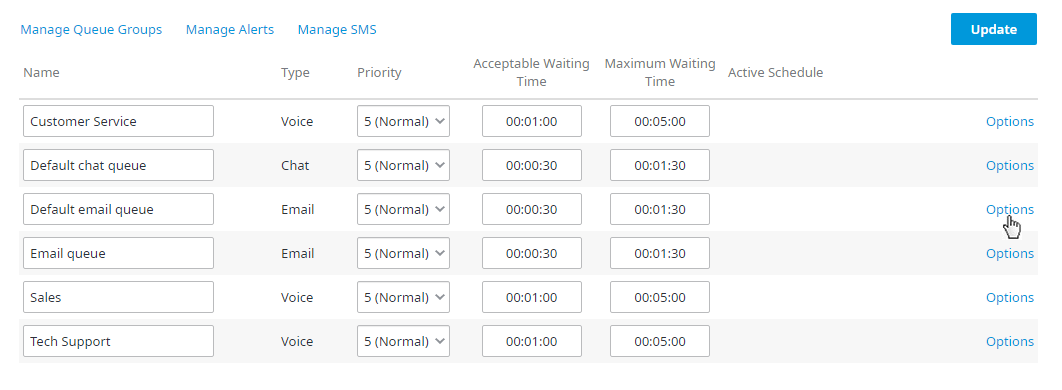
- The Configure Email Queues page opens.

- In the Email in queue time to live (days) field enter a value between 1 and 365. This value indicates how many days an email in the selected queue will remain waiting in the queue until it is removed from the queue automatically or manually using the feature on the Monitoring page.
Note: The default and maximum time to live duration is 365 days; values cannot exceed 365 days. The shortest time to live duration is 1 day. If a value less than 1 or greater than 365 is entered, you will receive the following error message upon clicking Update: “Email in queue time to live (days) has to be between 1 to 365”. If an email is sent to another queue before the time to live duration is reached, the time to live for that email gets refreshed and remains in the new queue for the time to live duration set for that queue.However, if you have an email dequeue to the same queue, just with a different priority, the time to live clock does NOT reset, as the email did not change queues, and the time to live clock for that email continues from when the email was originally received.
- Optionally, you can choose to dequeue the email after a designated amount of time if it has not been attended to. To dequeue an email put a checkmark in the Dequeue after checkbox. From there you enter the number of days, hours or minutes you want the email to dequeue after from the drop down menu. Then select the queue from the queue drop down menu you wish the email to go to; you can select to have it stay in the same queue and change the priority, which in effect just bumps the priority of the email up or down from what it was before, or have it sent to another queue. After selecting the queue that you wish the email to go to, select the priority you want it to go to that queue with.

- Click Update to save your changes.

- All emails sent to the selected queue remain in the queue for the number of days specified in the time to live field, unless an Agent deals with the email or management manually deletes the email. Once the time to live duration is reached, the email is automatically deleted from the email queue.
Related Articles
Related content
Since July 6, 2023, Atlassian has no longer been used for Release Notes or knowledge base articles.
* Find Release Notes here (https://support.mycontactcenter.net/app/articles/detail/a_id/23378/) and articles here (https://support.mycontactcenter.net/app/main).
* Authenticated Partners can access content here (https://support.mycontactcenter.net/cc/sso/authenticator/oauth/authorize/imcontrolpanel?redirect=main&source=mycontactcenter)