Since July 6, 2023, Atlassian has no longer been used for Release Notes or knowledge base articles.
* Find Release Notes here (https://support.mycontactcenter.net/app/articles/detail/a_id/23378/) and articles here (https://support.mycontactcenter.net/app/main).
* Authenticated Partners can access content here (https://support.mycontactcenter.net/cc/sso/authenticator/oauth/authorize/imcontrolpanel?redirect=main&source=mycontactcenter)
Treatment Options Tab_OLD
- Karla Melendez
Here you can define settings relating to the chat treatment, such as available options for the client if a queue is closed or unattended, the estimated wait time, position in queue, and chat dequeue time. Queue treatments occur after the chat has been initiated.
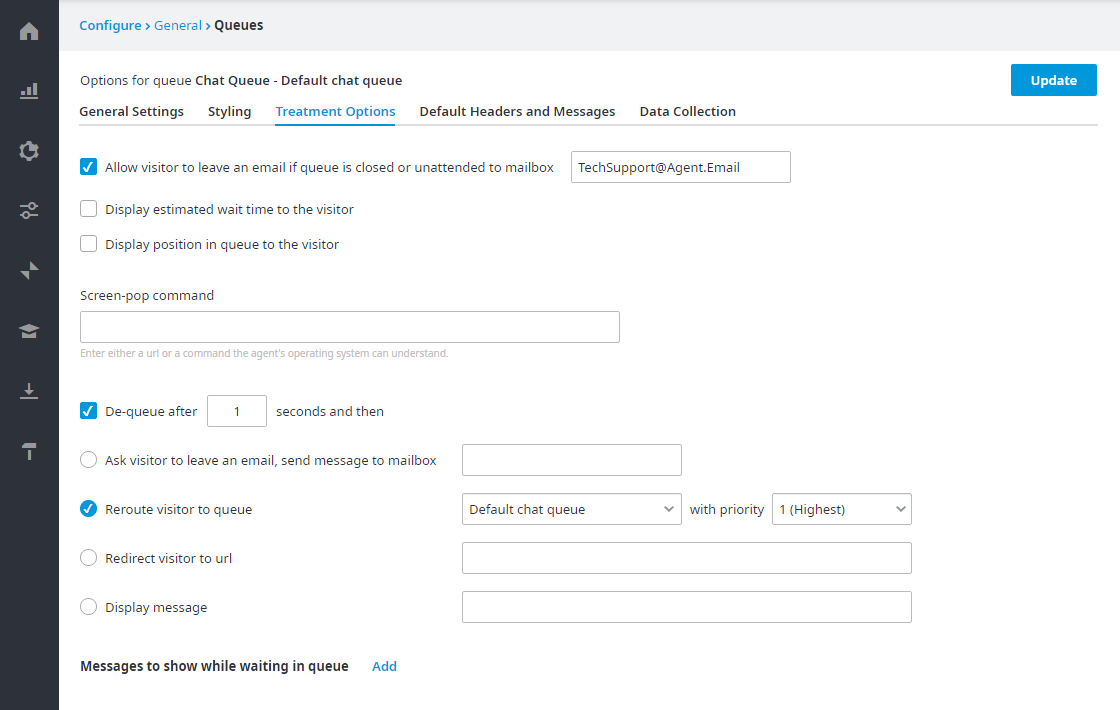
Select one or more of the Treatment Options to be used during a chat session:
- Allow user to leave an email if queue is closed or unattended to mailbox – If selected, and the queue is closed or unattended, the customer will be presented with a leave a message option. If a customer is waiting in queue and the queue closes before an Agent responds to the customer's chat, the customer will also be transferred to the Leave a message option, if it's presented.

Customers will complete the required fields and submit the email if they wish to send the inquiry via email.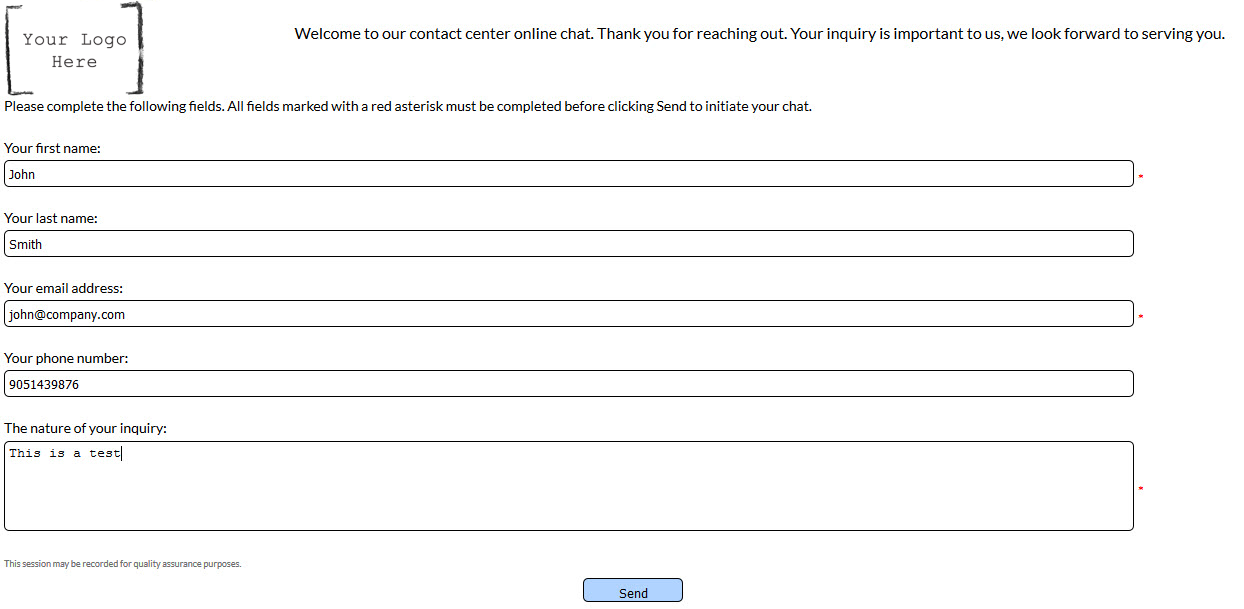
- Display estimated wait time to the customer – If selected, a message indicating what the estimated wait time in queue is before the customer is connected with an Agent via chat. The wait time is dependent on how many people are already in the chat queue. If the queue is closed or unattended the customer will not enter the queue, and therefore will not be presented with an estimated wait time.

- Display position in queue to the customer – If checked, a message indicating the customer's position in the queue. This number will increase or decrease depending on the chats received (e.g. position in queue might increase if another chat is deemed higher priority, the position in queue will decrease as chats with other client's end). If the queue is closed or unattended the customer will not enter the queue, and therefore will not be presented with position in queue. Since the customer will remain in the queue waiting view up until the agent sends the first message, the position in queue will remain at "1" while the customer's chat conversation is awaiting the first message from the agent.

- Screen pop command – Enter text that will be presented to the Agent upon chat initiation; this text must be a URL or a command the agent's operating system can understand. A screen pop will be initiated based on the URL that is provided in this field.

- Dequeue after x seconds and then – Select this option to remove customers from the queue if their chat is not answered by the specified time. In the Time field, enter a number to define the dequeue time, in seconds.

If customer dequeue is enabled, you must select dequeue options that will provide customers with an alternative action to submitting their inquiry; only one dequeue option can be selected.
- If Reactive Chat is enabled, all Dequeue Options are usable and valid, because the customer is transferred to a queue once a chat is initiated.
- If Reactive and/or Proactive Chat With Invite is enabled, all Dequeue Options are usable and valid, because the customer is transferred to a queue once a chat is initiated.
- If Reactive and/or Proactive Chat Without Invite is enabled, all Dequeue Options are usable and valid for reactive chat only, but not for the Proactive Chat without invite. Proactive chat without invite never puts the customer in queue, so most of the dequeue options don’t apply for this mode; the only dequeue option that is valid is Reroute visitor to queue x with priority y. You can set the dequeue time to however many seconds you wish, and then re-route customers to another queue and it will take effect by selecting another queue for the customer, without informing the customer of the queue transfer; the customer only sees the Agent’s chat message upon chat initiation, in whichever queue the customer ends up in. If a dequeue option other than Reroute visitor to queue is selected, because that is the behavior you have selected for Reactive Chat, then the proactive without invite will ignore that selected option.
Listed below are all the available Dequeue options:
- Ask customer to leave an email, send message to mailbox – If this option is selected, the Email screen will be presented to the customer and the customer will be asked to submit an inquiry via email (See screenshot below.)
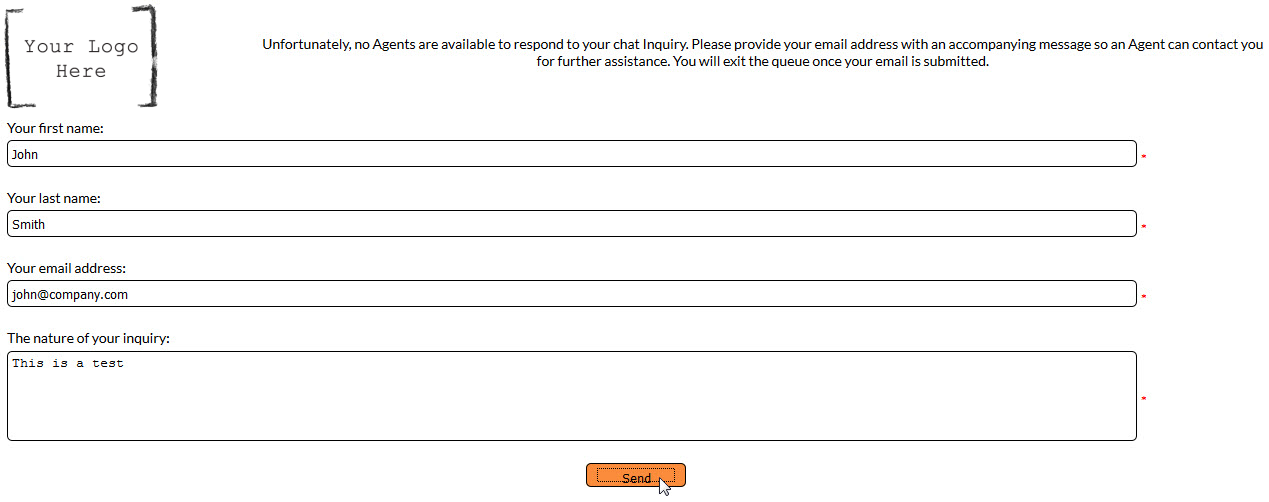
If the Collect User Information screen was presented upon chat initiation, any relevant fields that were entered on that screen will automatically be populated in the Email screen. If the Collect User Information screen was not presented previously, the customer will have to manually complete the fields before submitting the email. The email will be sent to the specified email address.
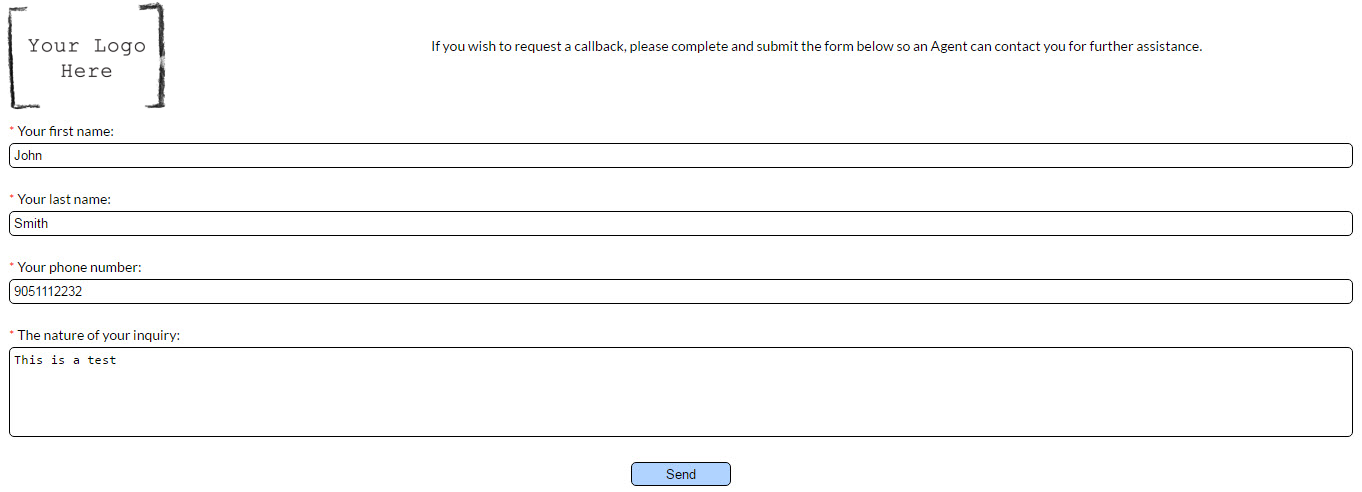
- Ask customer to leave a callback, send request to queue – From the drop down menu select the queue where you want the callback request sent. If this option is selected, the Leave Callback screen will be presented to the customer and the customer will be asked to request a callback

Note: Callbacks can only be sent to Dial Out queues, if no Dial Out queues are available, callbacks cannot be requested.
- If the Collect User Information screen was presented upon chat initiation, any relevant fields that were entered on that screen will be automatically populated on the Callback screen. If the Collect User Information screen was not presented previously, the customer will have to manually complete the fields before submitting the callback request. The callback will be sent to the selected queue.
- Reroute customer to queue x with priority y– From the Queue drop down menu select a queue, and from the Priority drop down select a priority. If this option is selected, the client will be rerouted to the selected queue with the specified priority.

If the customer is rerouted to another queue, and the Collect Customer Information screen is enabled for that queue, the customer will not be asked to enter any information, regardless of whether or not information was entered initially. Instead the customer will immediately enter queue treatment in the new queue. - Redirect customer to URL – Enter a URL address of the location you want to send the client if the dequeue time is reached. Once the dequeue time is reached the client will be automatically transferred to the specified location.

- Display message – enter the message you want displayed to the client if the dequeue time is reached. This message will be presented to the client before the client is dequeued.

Messages to show while waiting in queue:
In the Message field type the text you wish to present to the client while the client is waiting in queue. In the Duration field, enter the duration the message is to be displayed.
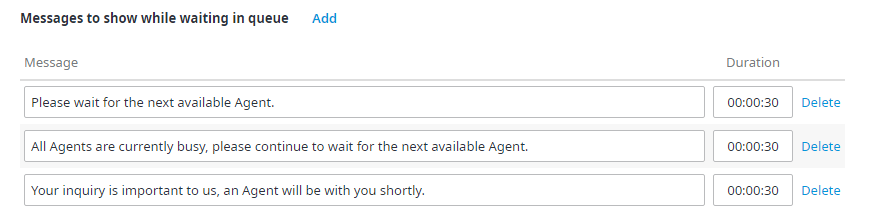
If multiple messages are added they will be displayed in rotation on the Wait in Queue screen, and will loop continuously until an Agent responds to the chat or until the dequeue time is reached (if dequeue option is selected). If the queue is closed or unattended, these messages will not be displayed, rather the customer will enter the defined queue closed treatment.
Click Add to add as many message fields as you require. To delete a message, click Delete, located to the right of the message.
If the Collect Customer Information screen is presented to the customer, the defined Welcome message will be displayed until the information is submitted. Once the page is submitted, the remaining messages will be displayed in the order they appear on the Treatment Options tab. If the Collect Customer Information screen is not presented to the customer, the defined Welcome message will not be displayed.
Related content
Since July 6, 2023, Atlassian has no longer been used for Release Notes or knowledge base articles.
* Find Release Notes here (https://support.mycontactcenter.net/app/articles/detail/a_id/23378/) and articles here (https://support.mycontactcenter.net/app/main).
* Authenticated Partners can access content here (https://support.mycontactcenter.net/cc/sso/authenticator/oauth/authorize/imcontrolpanel?redirect=main&source=mycontactcenter)