Since July 6, 2023, Atlassian has no longer been used for Release Notes or knowledge base articles.
* Find Release Notes here (https://support.mycontactcenter.net/app/articles/detail/a_id/23378/) and articles here (https://support.mycontactcenter.net/app/main).
* Authenticated Partners can access content here (https://support.mycontactcenter.net/cc/sso/authenticator/oauth/authorize/imcontrolpanel?redirect=main&source=mycontactcenter)
Start a Chat Session
- Larry Brown (Deactivated)
- Karla Melendez
- Jela Banovic (Deactivated)
- Former user (Deleted)
To start a chat session with the Call Center Agent:
- Click on the Chat button located on the right side of the top bar.
- The Select User window opens.
- Place a checkmark next to the members you wish to add to your chat session.
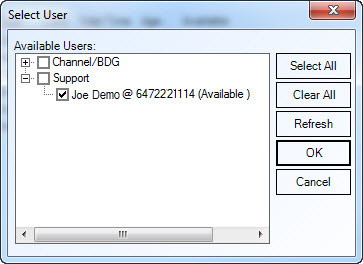
- Click OK.
5.The Chat Session window opens. Information from the Collection page will displayed in the Chat window. The header of the chat indicates who initiated the chat.
For Agent to Agent chat, the agent who initiated the chat will appear in the Conversation with field.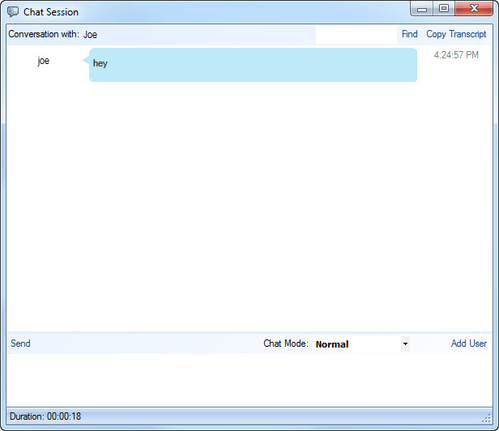
For Client to agent chat, if the Collect Info page for the queue treatment is turned on, and all fields are entered, the name of the client initiating the chat will appear in the Conversation with field; any other information entered in the Collect Info page will appear in the User Information section of the chat window (e.g. First name, last name, email address, phone number, and inquiry). 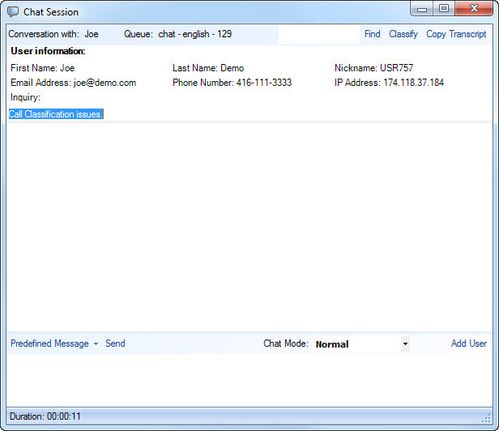
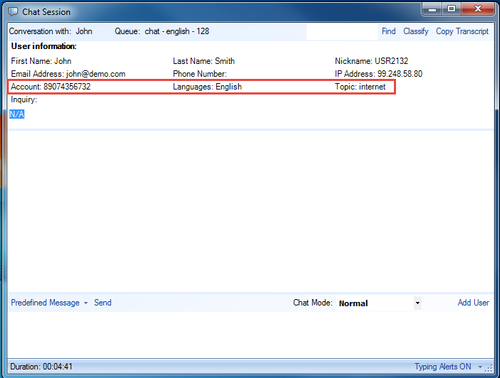
If Custom Chat Fields have been created and are requested of the customer initiating the chat, these fields appear in the third row of the chat window User Information section. Custom Chat Fields are created in the Client Admin Portal, and must be created separately for each queue in order for them to appear on the Collect Information Screen. If the Custom Fields are enabled, they will appear on the Collect Information Screen as well as in the User Information section of the initiated chat window. If the custom fields are marked Mandatory, the customer must complete these fields and the information will appear, along with the fields, in the initiated chat window. If the Custom Fields are disabled, they will not appear in the initiated chat window, nor will they be presented to the customer on the Collect Information screen.
Note: Call Center Agent for Windows Version 11.7 or higher is required for Custom Chat Fields.
For Client to agent chat, if the Collect Info page is turned off, or if fields are left blank, the Conversation with field will display a generic user code of USR###, where ### is substituted by the number assigned to the client (e.g. USR758), and the User Information fields will remain blank with the exception of the Nickname, which is populated with the generic user code and the IP Address.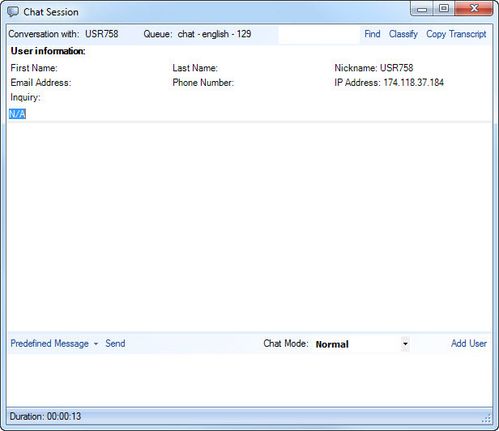
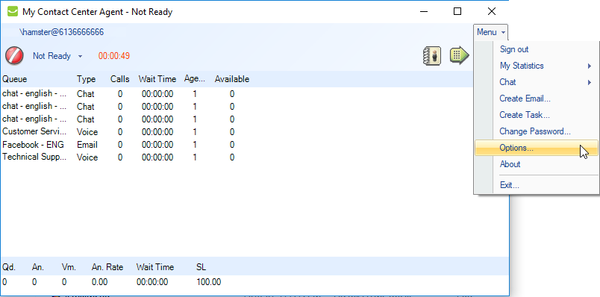
In order to not miss any messages agent's have the option to turn on a feature that will force new chat sessions and when a client sends a new message to the forefront of their screen, regardless of how many tabs they may have open. To turn on these features click on the Menu tab at the top of the screen and click on Options from the drop down it produces.
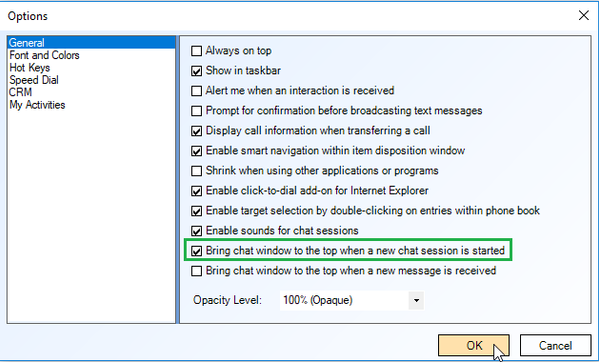
From the Options screen, if the agent wishes to have new chat sessions come to the front of their desktop, they would put a checkmark in the Bring chat window to the top when a new chat session is started checkbox. Click OK to have these changes saved and take effect immediately.
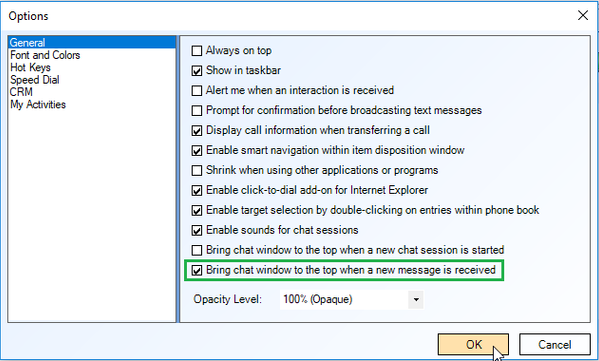
If the agent wishes to have the chat session brought to the front of their screen each time a client sends a new message they would put a checkmark in the Bring chat window to the top when a new message is received checkbox. Click OK to have these changes saved and take effect immediately. Note - this behavior will only happen if the CCA's main window is currently in focus.
6. Type your message in the bottom section of the Chat window and click Send. Your message is sent to the user you selected in step 3.
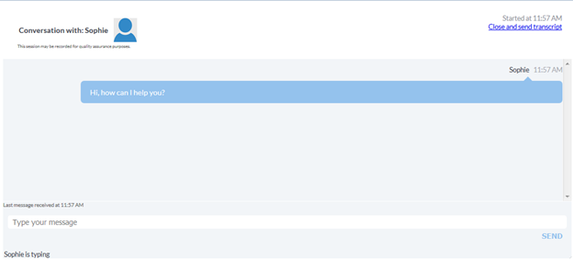
7. If you have uploaded a Profile Picture to your account from the Admin Portal, that picture will appear in the Customer Chat window when you respond to an initiated chat.
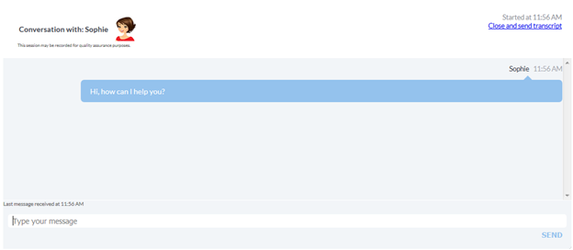
If you have not uploaded a Profile Picture to your account, the default image will be displayed
Note: When either the Customer or Agent exits the chat, a message is displayed indicating the user has left the chat.
For related articles see:
Since July 6, 2023, Atlassian has no longer been used for Release Notes or knowledge base articles.
* Find Release Notes here (https://support.mycontactcenter.net/app/articles/detail/a_id/23378/) and articles here (https://support.mycontactcenter.net/app/main).
* Authenticated Partners can access content here (https://support.mycontactcenter.net/cc/sso/authenticator/oauth/authorize/imcontrolpanel?redirect=main&source=mycontactcenter)