Since July 6, 2023, Atlassian has no longer been used for Release Notes or knowledge base articles.
* Find Release Notes here (https://support.mycontactcenter.net/app/articles/detail/a_id/23378/) and articles here (https://support.mycontactcenter.net/app/main).
* Authenticated Partners can access content here (https://support.mycontactcenter.net/cc/sso/authenticator/oauth/authorize/imcontrolpanel?redirect=main&source=mycontactcenter)
Adding Intervals
- Larry Brown (Deactivated)
- Karla Melendez
- Jela Banovic (Deactivated)
This page explains how to set up a schedule for each day of the week.
To edit working hours for a day of the week
- Follow the instructions for accessing the Schedule Details page as outlined in Editing an Existing Working Hours Schedule.
- Click the tab corresponding to the date you want to edit or configure (e.g., Monday). An hourly schedule appears.
- If this is a new schedule, the schedule appears blank.
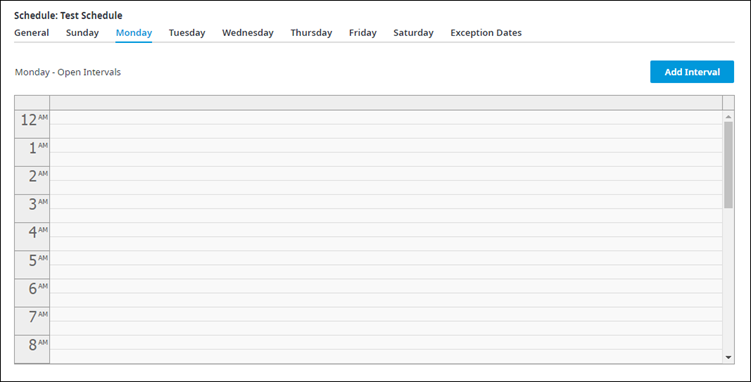
- Otherwise, information for working hours appears.
- If this is a new schedule, the schedule appears blank.
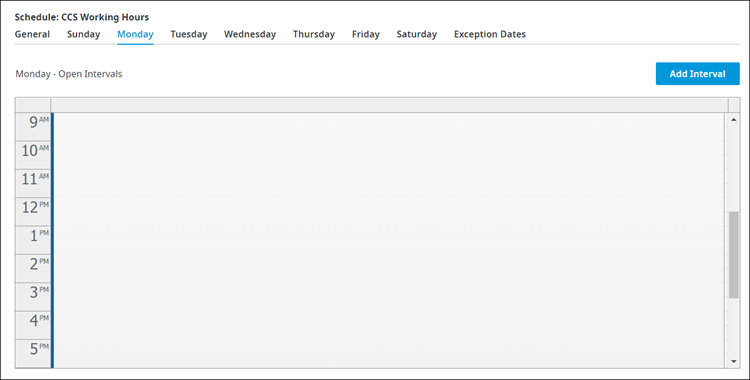
- Click Add Interval to add your Contact Center's working hours for the selected day.
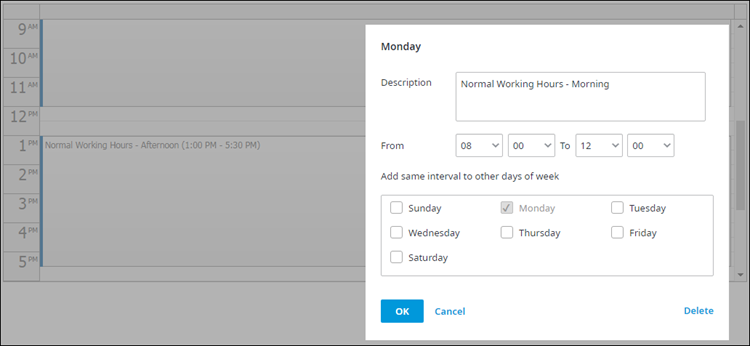
- In the Edit Interval dialog box that appears, enter the following:
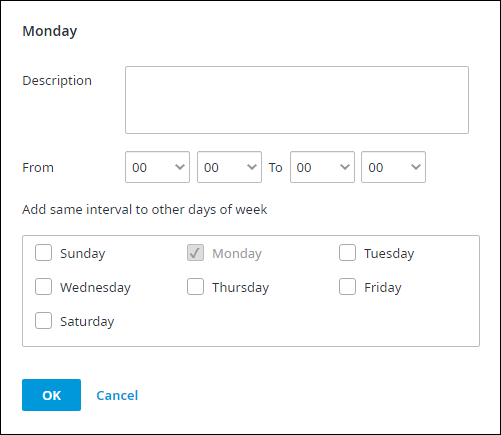
- Description: Enter a description for the current interval (e.g., Normal Working Hours).
- From: Select the start time for the interval using the 24-hour clock.
- Enter the hours in the first box (e.g., 08), and the minutes in the second box (e.g., 00).
- To: Select the closing time for the interval using the 24-hours clock.
- Enter the hours in the first box (e.g. 17), and the minutes in the second box (e.g., 30).
- Add same interval to other days of the week (Monday to Sunday): Click to select the checkboxes for each day of the week you want the interval applied. For example, if you click to select Tuesday, Thursday, and Friday, the current interval will be applied to each of those days as well.
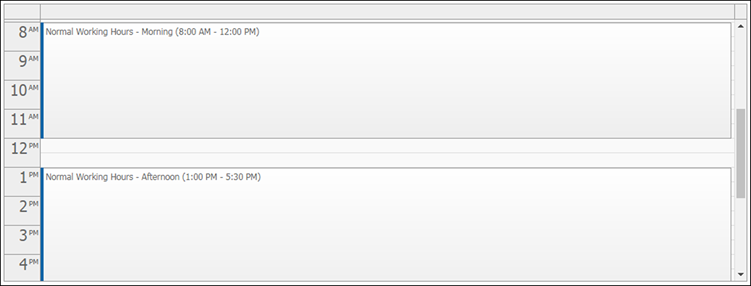
Note: Multiple working hour intervals can be applied in one day. For example, the first working hour interval for the day could be from 8:00 to 12:00, while the second could be from 13:00 to 17:30. This would indicate that the Contact Center is closed for lunch from 12:00 to 13:00. - Click OK when done.
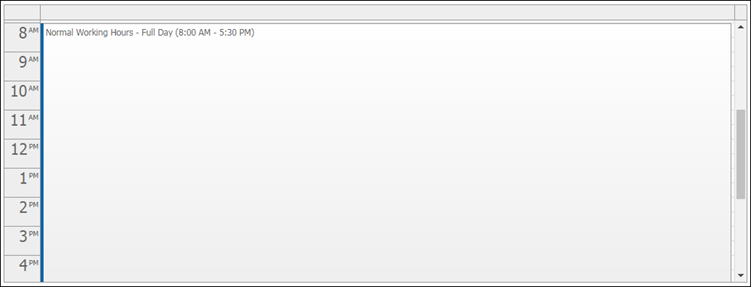
The following two images show examples of a completed day.- This image shows the case where a single interval has been set up for the day.
- This image shows the case where two intervals have been set up for the day.
- This image shows the case where a single interval has been set up for the day.
- Repeat for all the days of the week as necessary.
- When done, return to the General tab and click Update.
Importan: Always click Update to ensure times and dates are saved and the Working Hours schedules are updated.
Changing the Intervals
Once configured, you can always change the intervals.
To change an interval
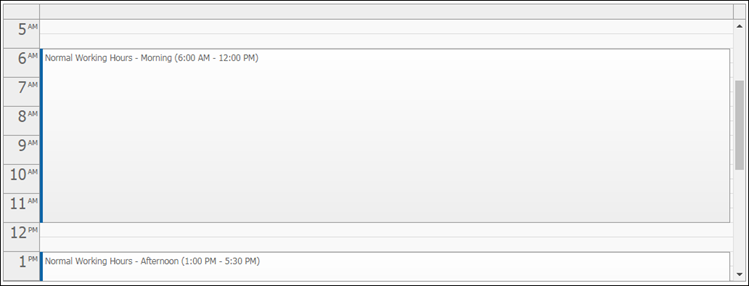
- Click the interval area. The Edit Intervals dialog box appears.
OR - Click and drag the borders of the intervals in the schedule view to increase or decrease the length of the interval, or
Click and drag the block of time up or down in the schedule to change the start and close times of the interval.
The working hours displayed in the schedule automatically adjusts once you've increased or decreased the interval length or moved the block of time within the schedule.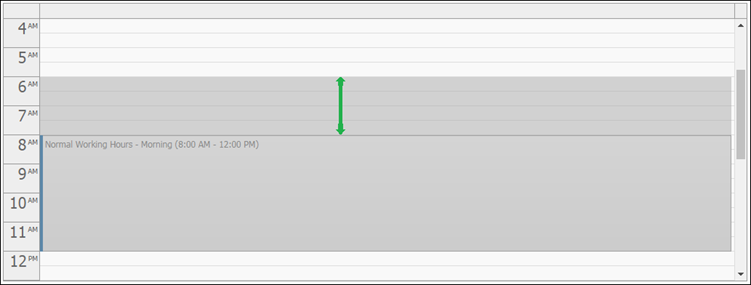
Related content
Since July 6, 2023, Atlassian has no longer been used for Release Notes or knowledge base articles.
* Find Release Notes here (https://support.mycontactcenter.net/app/articles/detail/a_id/23378/) and articles here (https://support.mycontactcenter.net/app/main).
* Authenticated Partners can access content here (https://support.mycontactcenter.net/cc/sso/authenticator/oauth/authorize/imcontrolpanel?redirect=main&source=mycontactcenter)