Since July 6, 2023, Atlassian has no longer been used for Release Notes or knowledge base articles.
* Find Release Notes here (https://support.mycontactcenter.net/app/articles/detail/a_id/23378/) and articles here (https://support.mycontactcenter.net/app/main).
* Authenticated Partners can access content here (https://support.mycontactcenter.net/cc/sso/authenticator/oauth/authorize/imcontrolpanel?redirect=main&source=mycontactcenter)
Change Outbound Auto Message
- Jela Banovic (Deactivated)
- Dave Vansickle (Unlicensed)
- Former user (Deleted)
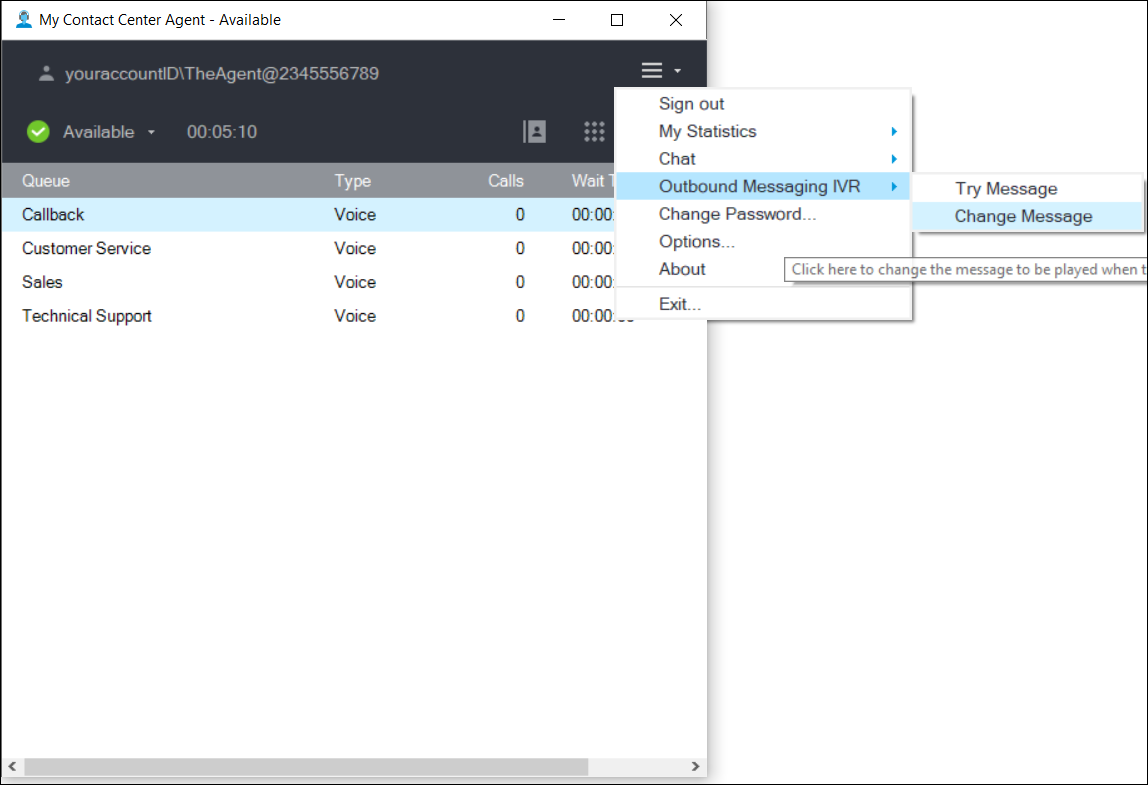
There may be instances where you wish to change your outbound message. For example, if your current outbound message is a personal message created for a particular customer, but you are preparing to call a large number of customers regarding a common issue, you may wish to record a more generic message that can be sent to all customers on your calling list.
- Select Menu > Outbound Messaging IVR > Change Message.
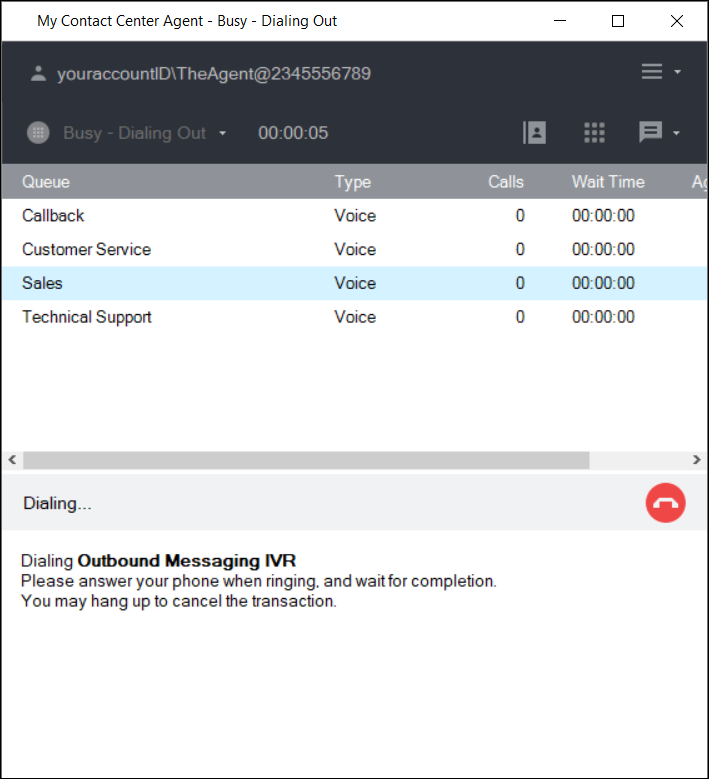
- The CCA performs a Dial Out.
- Your Agent Status changes to Busy-Dialing Out.
- The Current Call information section displays the following message: “Dialing Outbound Messaging IVR. Pick up your phone when ringing, and wait for completion. You may hang up to cancel the transaction.”
- Your telephone rings.
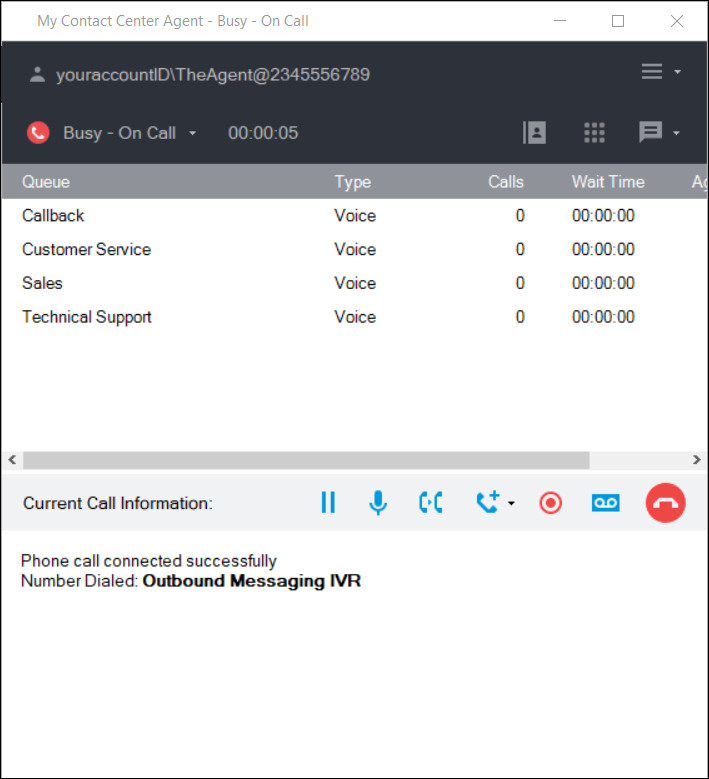
- Answer the telephone. The CCA connects the call to the Outbound Messaging IVR.
- Once dial out is successful, the Current Call Information section in the CCA displays the following message: “Phone call connected successfully. Number Dialed: Outbound Messaging IVR.”
- Your Agent Status changes to Busy-On Call.
- The initial recording plays: “Welcome to the Outbound Messaging IVR. To listen to your current outbound message, press 1. To change your outbound message, press 2.
- Press 2, on the telephone keypad.
- The recording plays: “Please record your new Outbound message after the beep. When finished recording your outbound message, press pound.”
- At the sound of the beep, speak your Outbound message, once done, press the pound (#) key on your telephone keypad.
- The recording plays: “Thank you. This is how your new message will sound, <plays new message>."
- Once your recording is played back, the IVR proceeds to say: “To update your new message, press 7, to record the message again, press 9.”
- To update your new message, press 7, and continue to step 15.
- To record the message again, press 9, and repeat steps 9 through 14.
- The recording plays: “Your message has been updated successfully,” and your recorded message is played back. This new message is now your active outbound message.
- The IVR then returns to the Initial Recording: “To listen to your current outbound message, press 1, to change your outbound message, press 2.” You can select one of these options, or if you are done with your outbound message, continue to step 17.
- Hang up the telephone.
- The Current Call Information section of the CCA displays the following message: "Phone call has finished. Number Dialed: Outbound Messaging IVR."
- Your Agent Status changes to Busy-Wrapping Up.
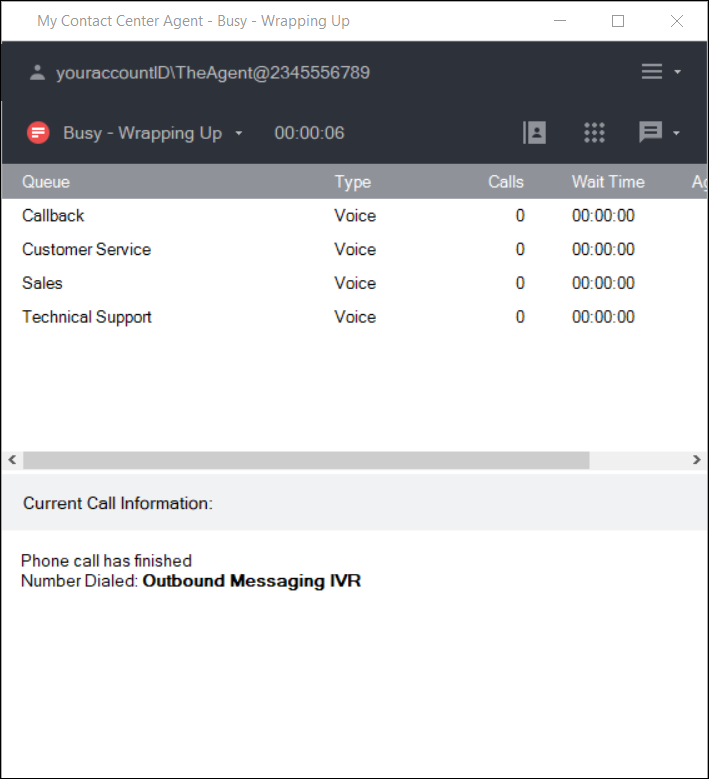
- Your outbound message is now ready to send to your customer(s).
Related content
Since July 6, 2023, Atlassian has no longer been used for Release Notes or knowledge base articles.
* Find Release Notes here (https://support.mycontactcenter.net/app/articles/detail/a_id/23378/) and articles here (https://support.mycontactcenter.net/app/main).
* Authenticated Partners can access content here (https://support.mycontactcenter.net/cc/sso/authenticator/oauth/authorize/imcontrolpanel?redirect=main&source=mycontactcenter)