Since July 6, 2023, Atlassian has no longer been used for Release Notes or knowledge base articles.
* Find Release Notes here (https://support.mycontactcenter.net/app/articles/detail/a_id/23378/) and articles here (https://support.mycontactcenter.net/app/main).
* Authenticated Partners can access content here (https://support.mycontactcenter.net/cc/sso/authenticator/oauth/authorize/imcontrolpanel?redirect=main&source=mycontactcenter)
Manage Queue Agents
- Larry Brown (Deactivated)
- Karla Melendez
- Jela Banovic (Deactivated)
When there are agents signed into a queue, click the number in the Agents column to view more information.
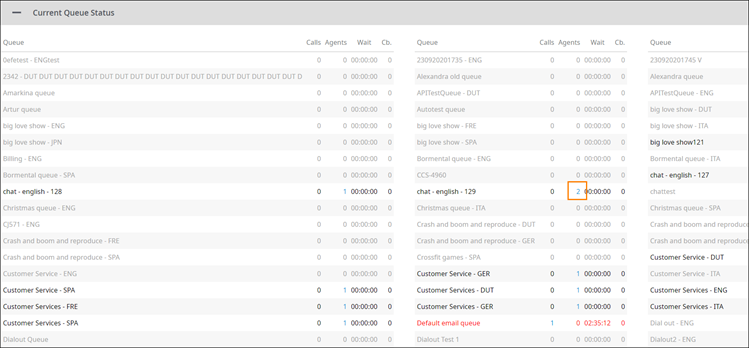
The Manage Queue Agents page opens in a separate tab sorted in alphabetical order by first name.
Important
- If you have an office manager role, only the agents assigned to your same office will appear on this page.
- You will only be able to add, remove, or text agents if you have a role with authority to perform any of these actions.
Find the following elements within the page.
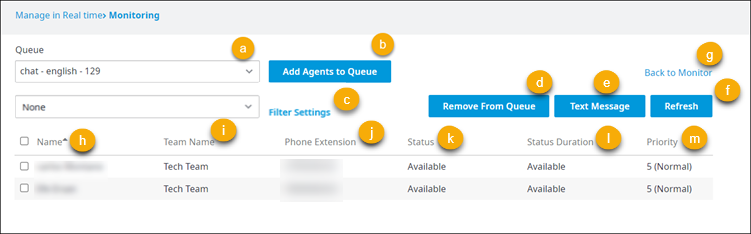
Top of the Page
Use these to manage the agents within the queue.
a. Queue: The name of the queue. Click to change to a different queue and see the agents signed into that queue, and then click Refresh to update the page.
b. Add Agents to Queue: Click to add more agents to the selected queue.
From the Add Agents to Queue dialog box that appears, click to select the agents, and then click OK.
Notes:
* Only the agents signed on to the Admin Portal and not signed into the selected queue appear in this list.
* If your role does not authorize you to add agents, no agent will appear in this list, and you will see an error message instead.
* Queue assignment is not persistent. When an agent you have added to the selected queue signs out of Admin Portal, they will be assigned to their original queue or skill the next time they sign into the portal.

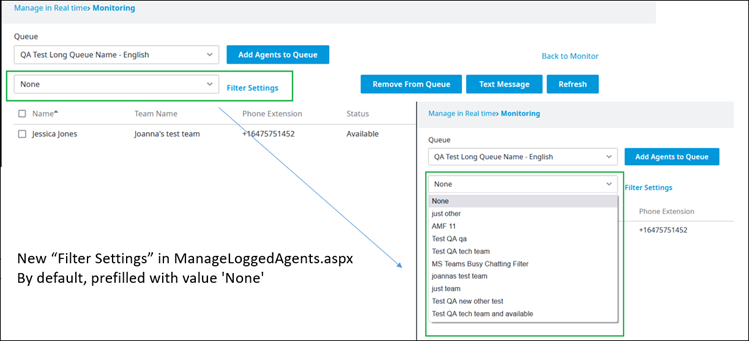
c. Filter Settings: Allows you to filter the page. Scroll down to the Filtering section of this article to learn more.
d. Remove from Queue: Click to remove an agent from the selected queue.
From the Signed in Agents section, click to select the checkbox that corresponds to the agent you want to remove, and then click Remove from Queue.
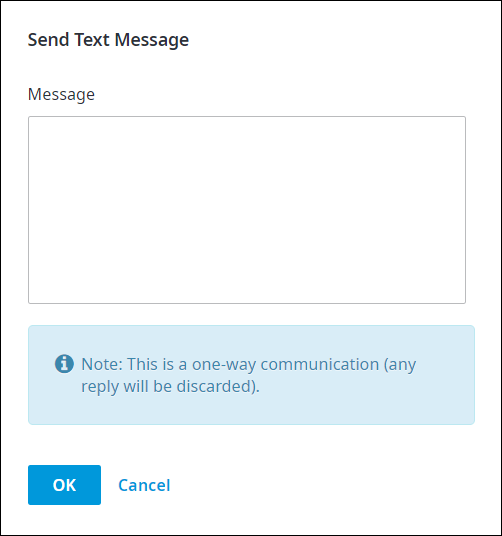
e. Text Message: Click to send a text message to a selected agent.
From the Signed in Agents section, click to select the checkbox that corresponds to the agent you want to send a text to, and then click Text Message. Then, in the Send Text Message dialog box that appears, type your message. Click OK when done.
Note: This is a one-way communication; the agent receiving the text will not be able to reply.
f. Refresh: Click to update the page if you have applied a search criteria in the Queue, From, or Subject boxes.
g. Back to Monitor: Click to return to the Monitor page.
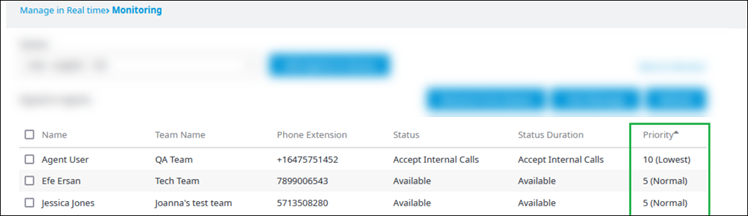
Signed in Agents section of the page
Displays the agents in the selected queue.
h. Name: The agent's name.
i. Team Name: The name of the team to which the agent belongs.
j. Phone Extension: The agent's 10-digit telephone number.
k. Status: The agent's current status in the Call Center Agent app.
l. Status Duration: The total length of time the agent has been in the indicated Status.
m. Priority: The selected queue's priority, as defined for the agent (e.g., 1 could indicate the highest priority and 10 the lowest priority).
FMI: For more information about setting a queue's priority for an agent, see Agent Skills.
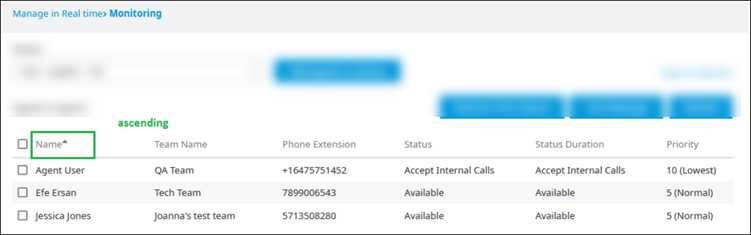
Sorting
Click the header of each column to sort as described below.
- Name: Sort in ascending or descending order.

- Team Name: Sort by the team name.
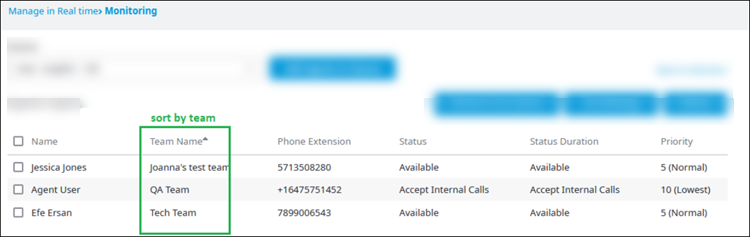
- Phone Extension: Sort by the phone number.
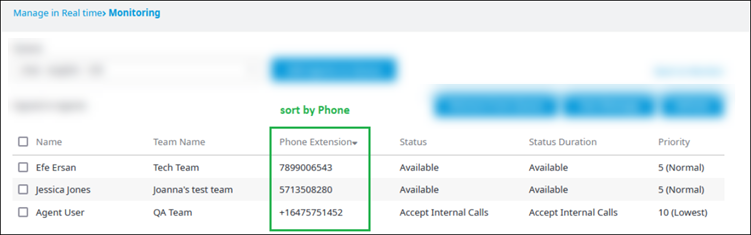
- Status, Status Duration: Sort by a particular status or status duration.
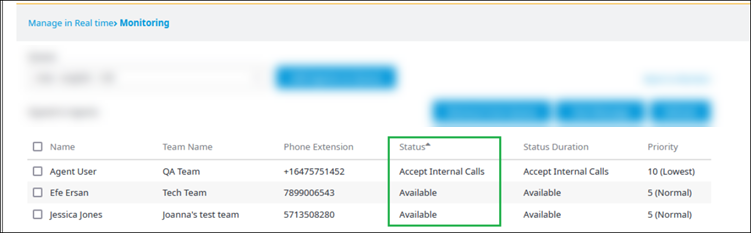
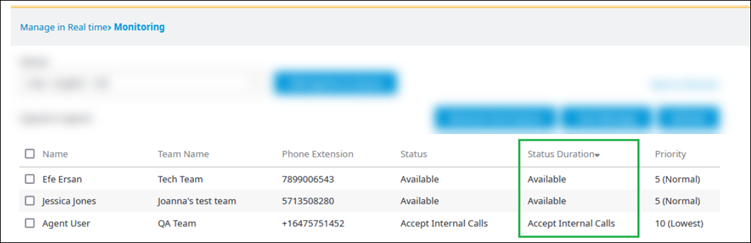
- Priority: Sort by a priority 1-10.
Use your browser’s scroll bar to move up or down the page.
There is no cap to the number of agents that can appear on the page.
Filtering
When you first access the Manage Queue Agents page, the Filter Settings drop-down list defaults to None.
When you click Filter Settings, an Agent Filters dialog box will appear. You will be able to Add, Edit, or Delete filters from this dialog box.
Adding filters: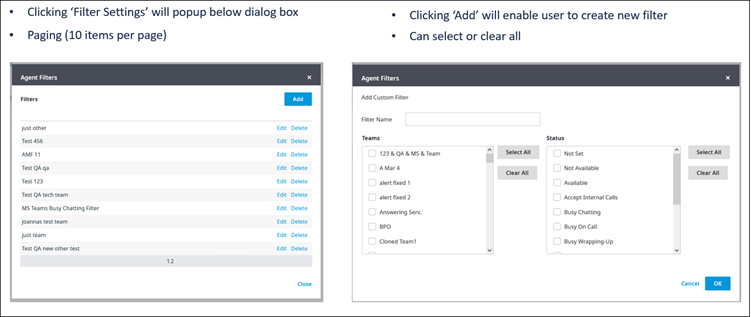
Editing and Deleting filters: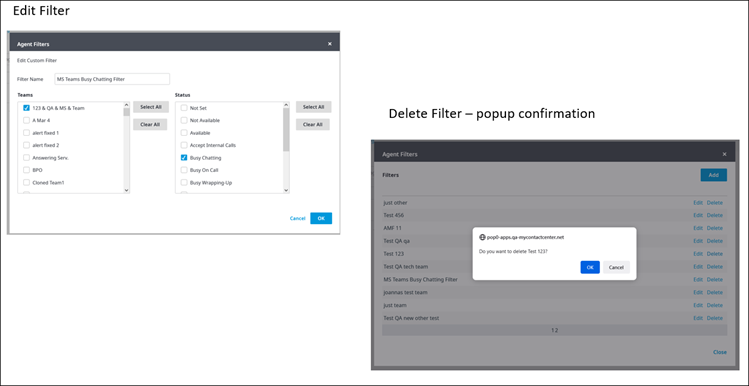
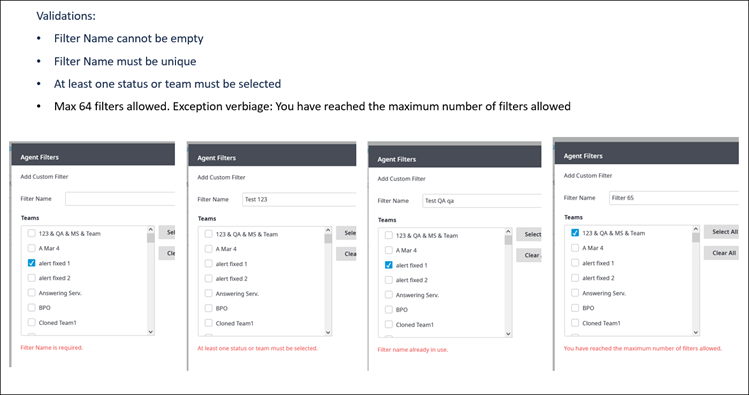
Filter validations:
Filter Name cannot be empty
Filter Name must be unique
At least one status or team must be selected
A maximum of 64 filters will be allowed. A warning will pop up if you exceed the number of filters allowed.
Related content
Since July 6, 2023, Atlassian has no longer been used for Release Notes or knowledge base articles.
* Find Release Notes here (https://support.mycontactcenter.net/app/articles/detail/a_id/23378/) and articles here (https://support.mycontactcenter.net/app/main).
* Authenticated Partners can access content here (https://support.mycontactcenter.net/cc/sso/authenticator/oauth/authorize/imcontrolpanel?redirect=main&source=mycontactcenter)