Since July 6, 2023, Atlassian has no longer been used for Release Notes or knowledge base articles.
* Find Release Notes here (https://support.mycontactcenter.net/app/articles/detail/a_id/23378/) and articles here (https://support.mycontactcenter.net/app/main).
* Authenticated Partners can access content here (https://support.mycontactcenter.net/cc/sso/authenticator/oauth/authorize/imcontrolpanel?redirect=main&source=mycontactcenter)
Accessing Schedule Manager
- Jela Banovic (Deactivated)
- cjeintermedia (Unlicensed)
- Larry Brown (Deactivated)
Before You Start
Note: The "Schedule Manager" menu will not appear on the menu pane if the feature is not activated for your account. Please contact your Service Provider for details on how to get the Schedule Manager feature enabled, and for assigning the Administrator role to the appropriate user.
Your Cloud Contact Center User profile must be set to a specific role related to the Schedule Manager. Your Administrator will make those settings for your contact center here as desired:
a) "Exclude from Schedule Manager"
b) "User"
c) "Supervisor"
d) "Administrator"
Accessing Schedule Manager
To access Schedule Manager:
1. Sign in to the Client Administration Portal. Need instructions for signing in? We've got you covered.
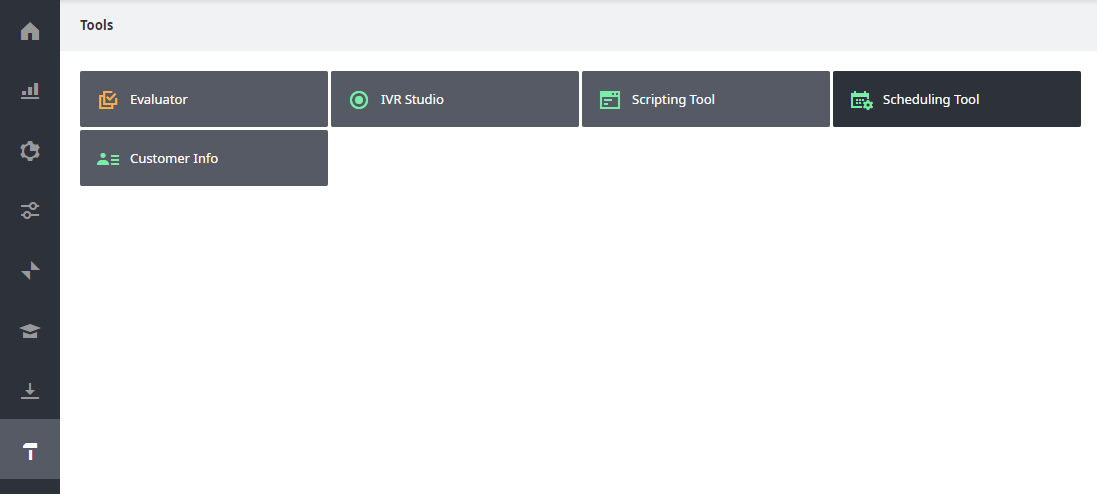
2. From the Navigation pane on the left, click Tools (hammer icon), then Scheduling Tool. Again, please note that if you don't see this navigation item, you may need to contact your Service Provider.
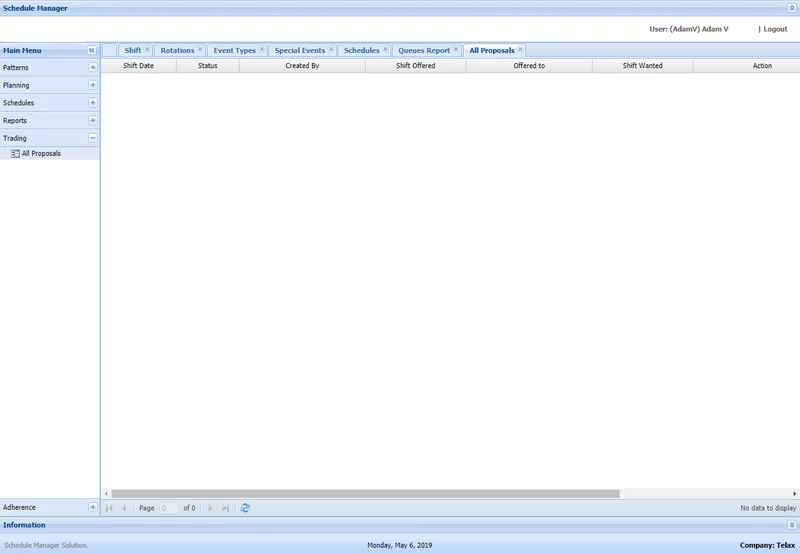
3. After clicking, a separate browser tab with the Schedule Manager application will appear.
Related content
Since July 6, 2023, Atlassian has no longer been used for Release Notes or knowledge base articles.
* Find Release Notes here (https://support.mycontactcenter.net/app/articles/detail/a_id/23378/) and articles here (https://support.mycontactcenter.net/app/main).
* Authenticated Partners can access content here (https://support.mycontactcenter.net/cc/sso/authenticator/oauth/authorize/imcontrolpanel?redirect=main&source=mycontactcenter)