Since July 6, 2023, Atlassian has no longer been used for Release Notes or knowledge base articles.
* Find Release Notes here (https://support.mycontactcenter.net/app/articles/detail/a_id/23378/) and articles here (https://support.mycontactcenter.net/app/main).
* Authenticated Partners can access content here (https://support.mycontactcenter.net/cc/sso/authenticator/oauth/authorize/imcontrolpanel?redirect=main&source=mycontactcenter)
Start a Web CCA Chat Session
- Jela Banovic (Deactivated)
- Former user (Deleted)
To start a Web CCA chat session:
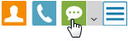
- Click on the Chat button located on the right side of the top bar.
- The PhoneBook window opens, displaying a list of all Agents Logged In to the Web CCA. Click the member you wish to add to your chat session and click Chat.
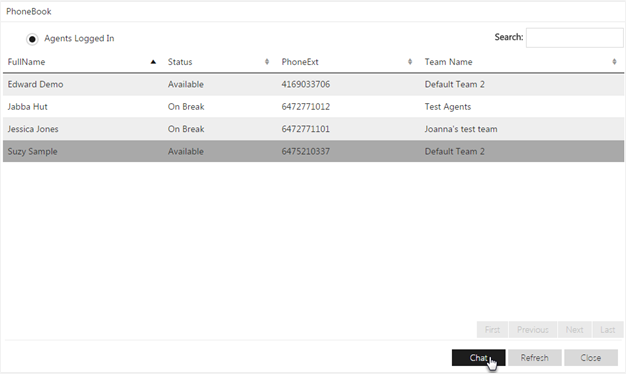
- Alternatively, if there are many Agents logged in to the Web CCA, in the Search field, located on the top right of the screen, type the agent you wish to chat with, and hit Enter.

- If the Agent you are searching for is logged in, the Agent's Name appears in the Agent List. Click the member to initiate the chat session.
Note: Depending on how many agents are logged in to the Web CCA, there may be multiple pages listing the agents. Use the First, Previous, Next, and Last buttons located on the lower left of the screen to navigate through the pages to find the agent you wish to chat with.
- The Chat window opens. The Header of the chat window indicates who initiated the chat.
For Agent to Agent chat, the name of the agent who initiated the chat appears in both the Initiated by field and in Chat window tab.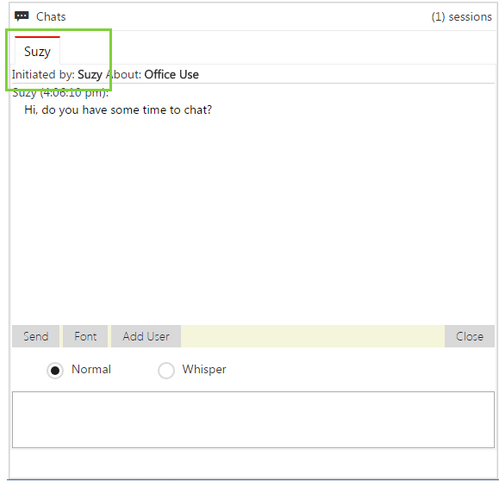
To proceed with a normal Agent to Agent, Agent to Client chat session, select the Normal radio button, located near the bottom of the chat window. When Normal is selected, all members of the chat will see your messages. Click the Whisper radio button during an Agent to Client chat, when there is more than one Agent on the call, to send a private message to the second Agent; the Client will not see the private message
Note: If Whisper is selected during an Agent to Agent chat, all Agents will be able to see the message since private messages are sent to all Agents on the chat. No private messages can be sent from one Agent to another Agent.
For Client to Agent chat, if the Collect Info page for the queue treatment is turned on, and all fields are entered, the name of the client initiating the chat will appear in the Initiated by field; any other information entered in the Collect Info page will appear in the User Information section of the chat window.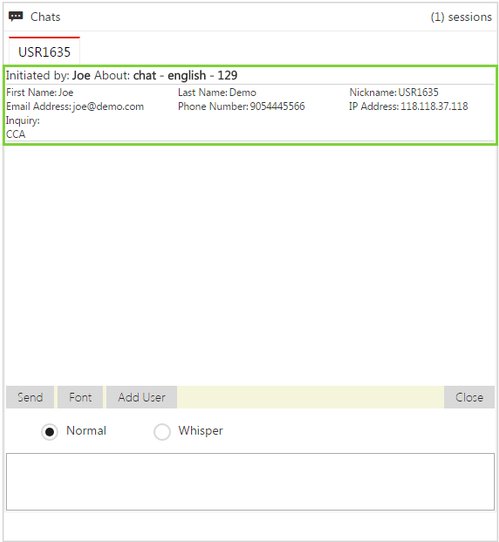
Note: By default, the User Information section in the Chat window is hidden. To view user information, position your cursor over Initiated by and right click on your mouse; the user information section appears, displaying the customers First Name, Last Name, Nickname, Email Address, Phone Number, IP Address, and reason for Inquiry. Click on Initiated by again to hide the User Information once again.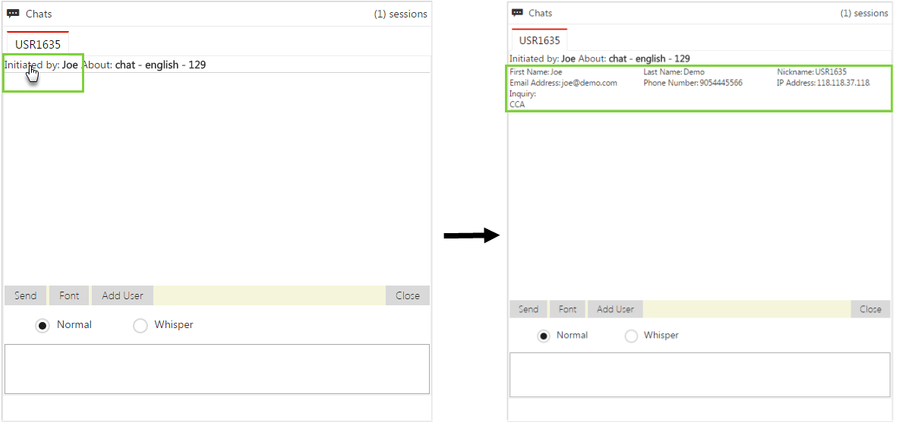
For Client to Agent chat, if the Collect Info page is turned off, or if fields are left blank, the Initiated by field will display a generic user code of USR###, where ### is substituted by the number assigned to the client (e.g. USR758), and the User Information fields will remain blank, with the exception of the Nickname, which is populated with the generic user code and the IP Address.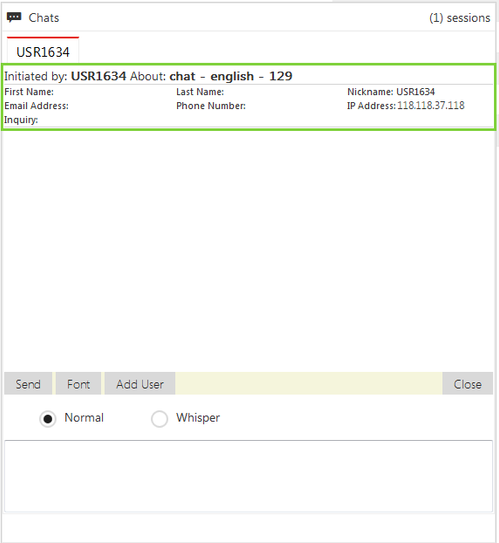
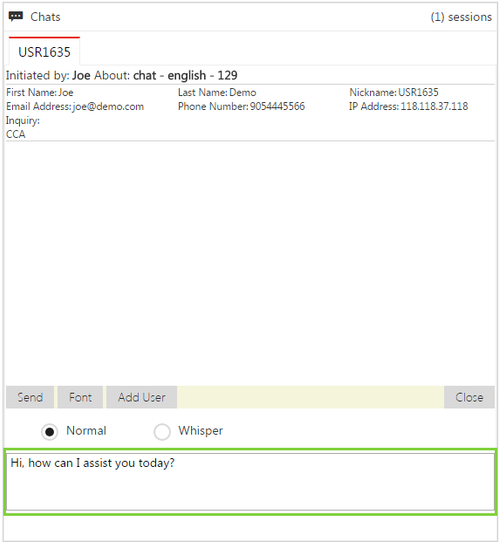
- Type your message in the bottom section of the Chat window and click Send. Your message is sent to the agent you selected in step 3 or the client who initiated the chat with you.
- If you have uploaded a Profile Picture to your account from the Admin Portal, that picture will appear in the Customer Chat window when you respond to an initiated chat.
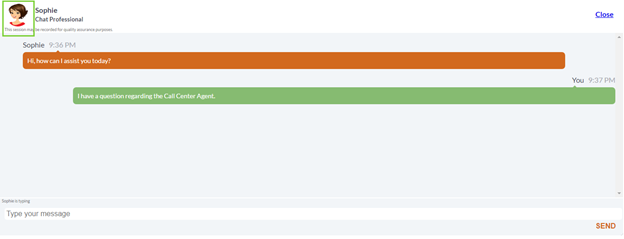
If you have not uploaded a Profile Picture to your account, the default image will be displayed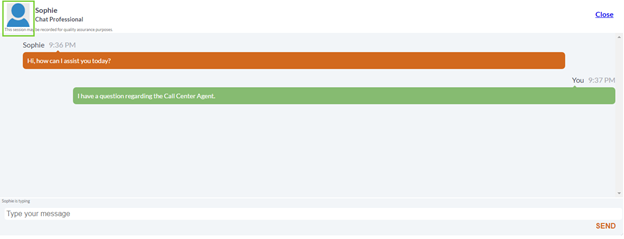
Note: When either the Customer or Agent exits the chat, a message is displayed indicating the user has left the chat. To exit a chat, click Close, located at the bottom of the chat window.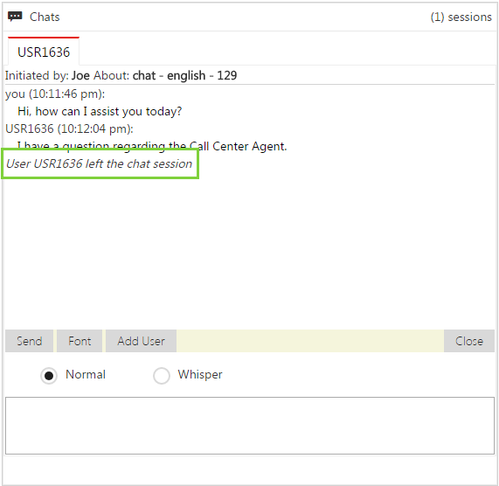
Related content
Since July 6, 2023, Atlassian has no longer been used for Release Notes or knowledge base articles.
* Find Release Notes here (https://support.mycontactcenter.net/app/articles/detail/a_id/23378/) and articles here (https://support.mycontactcenter.net/app/main).
* Authenticated Partners can access content here (https://support.mycontactcenter.net/cc/sso/authenticator/oauth/authorize/imcontrolpanel?redirect=main&source=mycontactcenter)