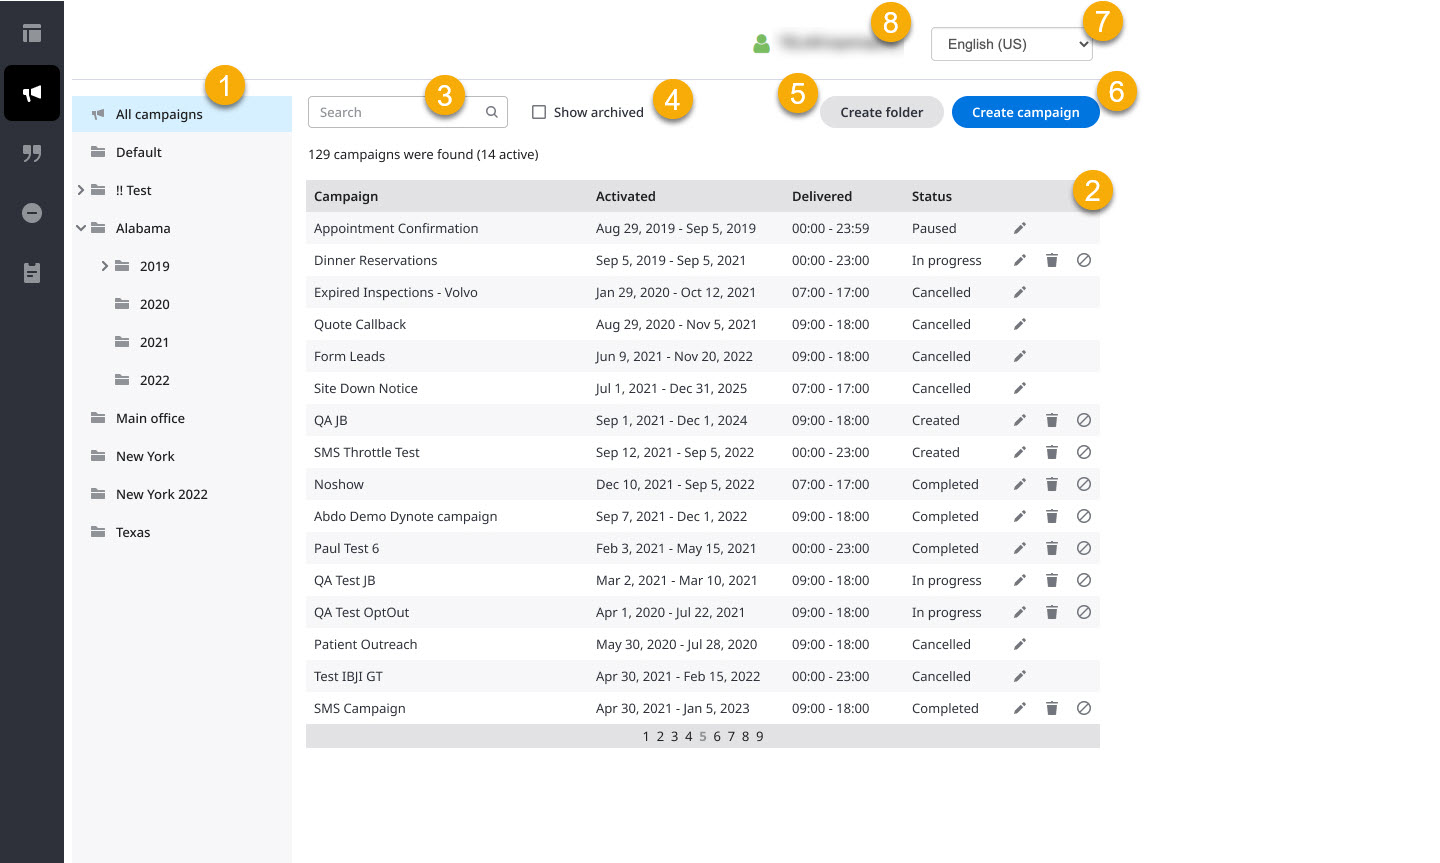
The Manage Campaigns option is where you can create, edit, search, and delete campaigns.
Here is a description of the page's features.
- Folders tree view: Helps you keep all your campaigns organized into categories set up by you. Once you have created a folder, you can Rename it or Delete it, if necessary.
- Campaigns: All campaigns contained within the folders are displayed on the right side of the screen.
- The far right column of each campaign includes options for editing, archiving, and canceling a campaign.
- If needed, you can always move a campaign from one folder to another.
- Search: A toolbox to help you search for specific campaigns. See Finding a Campaign
- Show archived: When you select this checkbox, the page displays campaigns that have been archived. See Archiving an Existing Campaign
- Create folder: Click this button to create folders and subfolders for organizing your campaigns. See Creating a Folder
- Create campaign: Click this button to create new campaigns. See Creating a Campaign
- Language menu: Select a language in which to display this page.
- Account/Username: The name of your account and account and username.
When you select a folder from the tree, all the campaigns assigned to the folder appear in the right pane.
Important
Campaigns associated with the selected folder’s subfolders will NOT be displayed.
- To see the campaigns from the selected folder’s subfolders, you will need to select the subfolders.
- Selecting All campaigns in the tree shows all the campaigns registered to the account.
- By default, you can only see active campaigns. To see archived campaigns, click the Show archived checkbox.
