When you are ready to do an evaluation you must first select which agent and interaction you are going to evaluate. This is done by searching for the recording you would like to evaluate and listening to that recording so you know what you will be evaluating. For more information on how to search for a recording, see the Search for a Recording page and for information on how to listen to the recording, see the Listen to Audio Recording page or the Read Email and Chat Log Recordings page, depending on the type of interaction you want to evaluate, Voice or Chat. There is also the option to listen to the recording using the In-App Media player function. This allows you to stream the recording directly inside of the evaluation.
For the purposes of this example, we will be evaluating a Voice call. A Chat evaluation would follow the same process, with having chosen a template created for the type of recording.
Preparing for Evaluation
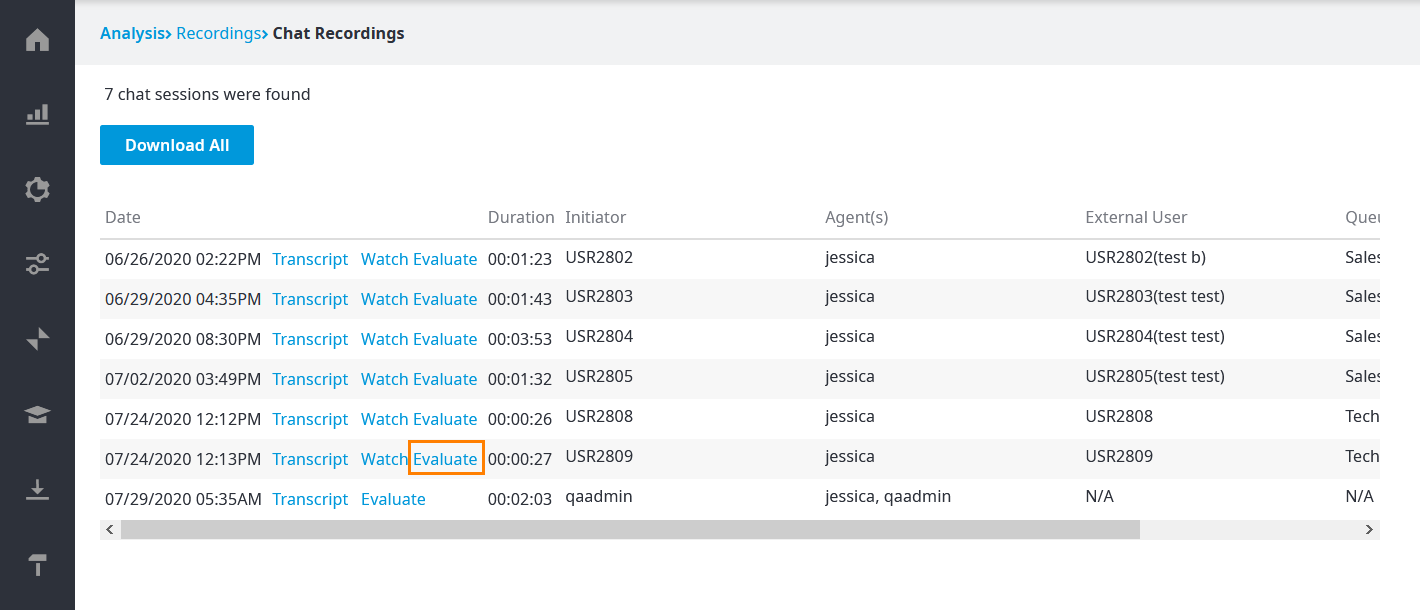
When you have located the recording that you want to evaluate, click Evaluate.
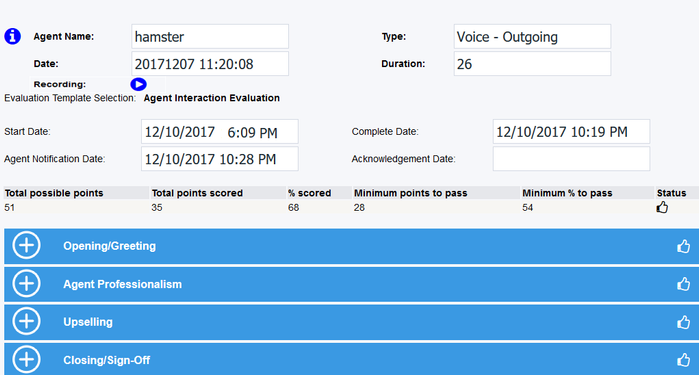
The following screen appears.
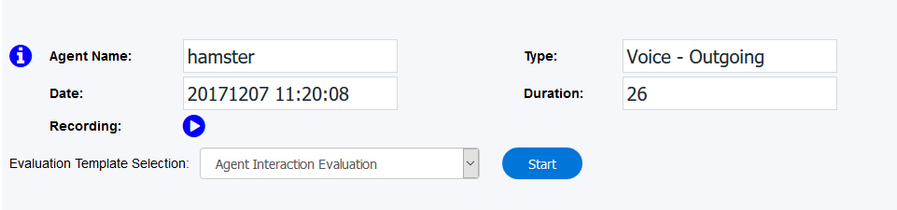
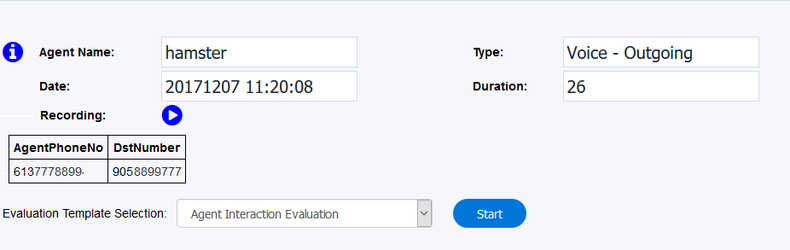
- Agent Name - Shows you the name of the agent who is being evaluated.
- Type - The type of interaction that is being evaluated.
- Date - The date and start time of the interaction.
- Duration - The time that the call lasted, in seconds.
- Recording - Clicking on the
 button will open a new window with the in-app media player to stream the recording.
Using the Media Player
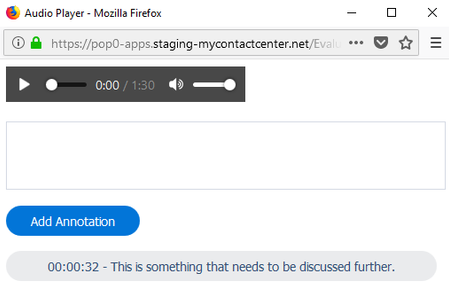
Once the Recording button has been clicked, a new window containing the recording will open.
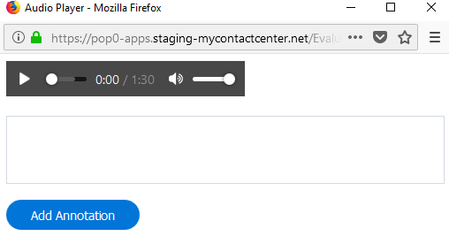
The media player functions as any regular media player. You can fast forward or rewind the call as needed. If you wish to make a note on a certain part of the call, you can do so by typing your note in the text box and clicking on the Add Annotation button.
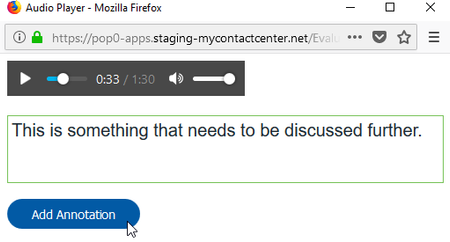
After clicking on the button, the annotation will appear at the bottom of the window. The annotation is able to be clicked on by yourself and the agent who is being evaluated, and it will bring them to that exact moment of the recording so they can hear exactly what they are being evaluated on. Note: Agents are not able to make annotations.
Optionally, you may click on the  icon to receive more information related to the call. Each type of interaction will have different additional information. For this call you can also see the Agent's phone number and the Destination number the agent was calling.
Start Evaluating
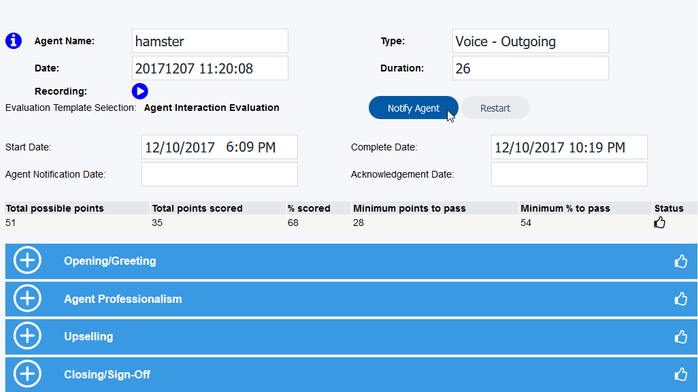
Now that you have selected the recording you wish to evaluate, select the template you would like to use from the Evaluation Template Selection drop-down menu and click Start. You will now be able to see and do the evaluation.
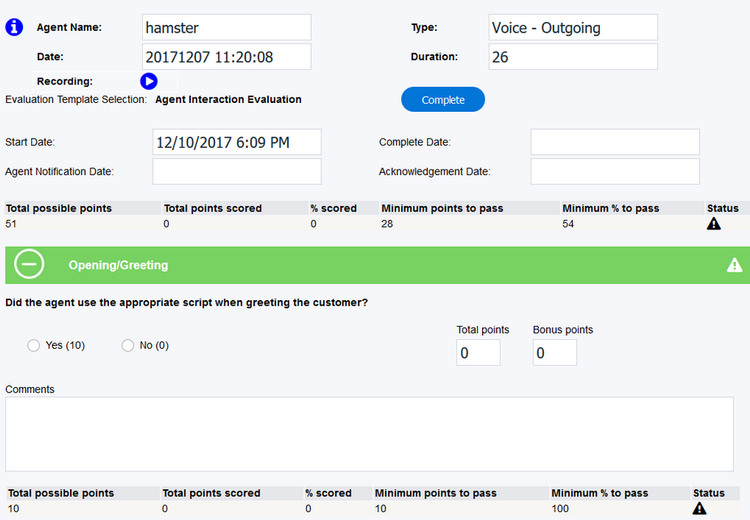
- Start Date - Shows the date and time the evaluation was started.
- Complete Date - Shows the date and time that the evaluation was completed. This will auto-generate once the Complete button has been clicked.
- Agent Notification Date - Shows the date and time that the notification of the evaluation was sent to the agent. This will auto-generate once the Notify Agent button has been clicked.
- Acknowledgement Date - Shows the date and time that agent acknowledged their evaluation. This will auto-generate once the agent has acknowledged the evaluation.
- Total possible points - The total number of points that can possibly be scored on the evaluation
- Total points scored - Shows the total number of points that have been scored by the agent. This number will update as the evaluation is completed.
- % scored - The score, as a percentage, that has been achieved on the evaluation. This number will update as the evaluation is completed.
- Minimum points to pass - The minimum number of points needed to be scored to pass the evaluation.
- Minimum % to pass - The minimum score, as a percentage, needed to pass the evaluation.
- Status - Indicates the status of the evaluation. This also applies to the status of each evaluation category. There are 4 status options:
 - Something still needs to be completed on the evaluation.
 - Indicates a passing mark.
 - Indicates a failing mark.
 - Indicates an auto-failure.
The green bar indicates the Category name. The questions can be collapsed for easier viewing by pressing the ![]() button or expanded by pressing the
button or expanded by pressing the ![]() button.
button.
Note: The Category bar will change to blue when the question has been collapsed.
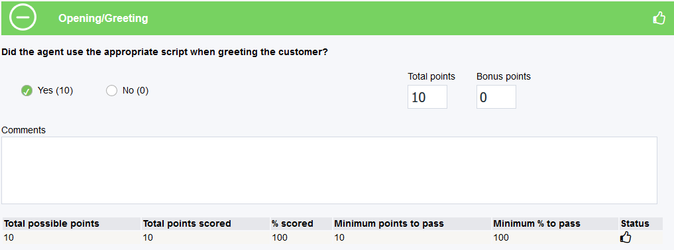
As you proceed through the evaluation, the program auto-saves your selections so as to not lose any of your progress.
Filling out template fields
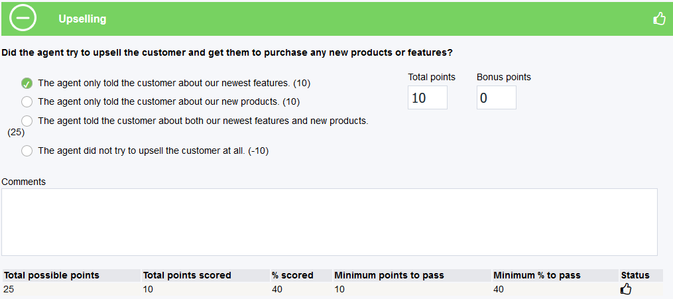
Make your selections for the evaluation:
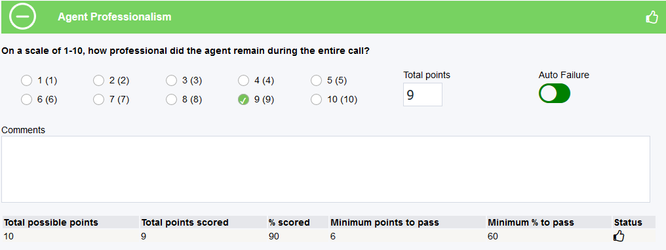
Note: If you wish to select Auto Failure for a question and it is one of the options, click on the Auto Failure button. A dialogue box will open with the following prompt:
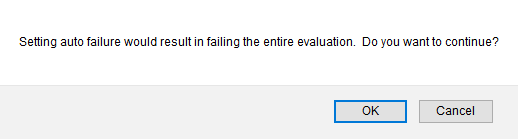
If you wish to select that question as Auto Failure, click OK. If not, click Cancel and you will be able to continue with the evaluation. It is important to remember that if Auto Failure is clicked, even if they agent passes every other category, and the evaluation as a whole, they will still fail if Auto Failure was selected.

Finishing up
Once you have finished with the evaluation click on the Complete button. This will auto-generate the date and time that the evaluation was completed. If you are satisfied with the evaluation and ready to let the agent know how they did, click on the Notify Agent button that is now available.
Note: Remember that once you have notified the agent of the evaluation it can not be edited or deleted. Be sure that you are 100% satisfied with the evaluation before notifying the agent.
There will now be a date and time in the Agent Notification Date field.
From here you may navigate to the Evaluations tab to check the status of the evaluation and see when the agent has acknowledged the evaluation.
Related articles