Reactive chat Chat occurs when the a customer seeks out a chat with an agent. Reactive chat is always enabled.
To initiate a chat with an Agent:
- The copies An end user would access the Reactive Chat URL provided in the Client Admin Portal Queues Configuration page, General Settings tab. As an administrator, and pastes you can copy the Reactive Chat URL and paste it into a browser web address bar for testing what the end-user sees.

- As an administrator who wants to test what the end-user sees, paste the URL into the a browser web address bar, and then press Enter.

- The Reactive Chat application opens. Depending on how the chat queue has been configured, the client is presented with you would see one of the following screens:
- A Data Collection screen (if this is the screen presented, the client proceeds you see, continue to step 34), where he you must complete all required fields (e.g., first name, last name, email address, nature of inquiry, etc.). Proceed to step 3
- A Waiting in Queue screen (if this is the screen presented to the client, skip you see, continue to step 5), where he is you are immediately placed in line to wait for the next available agent.
- Or If no agent is available, a message appears indicating the queue is closed or there are no available agents screen (if this is the screen presented to the client, skip you see, continue to the final Note following after step 9,10).
- The Data Collection screen is displayed. The client completes appears. Completes all required fields (e.g., first name, last name, email address, nature of inquiry, etc.). Required fields are marked with a red asterisk (*).Once all required fields are completed, the client clicks Send

- Click Send when done.
- If an Agent is available, the client proceeds to step 5continue with step 6.
- If an Agent is not available, the client skips continue to the Note.
- The Waiting in Queue screen is displayed. A series of messages will appear indicating that the client is waiting for the next available agent and specifying the estimated wait time.

- The A chat is presented window appears to the first available Agent. The Agent responds , who can then respond to the received chat.
Note: As the Agent is typing a message, a typing in progress message appears at the bottom of your chat window informing you that the Agent has received your chat and is responding (e.g. “Sophie is typing”).chat bubble with three dots appears.
- The Agent’s response to the client's chat initiation is delivered to the client, and the client is presented with the CCA chat windowis presented to the end-user. The chat window will display displays the Agent’s name (e.g. Sophie) accompanied along with an image of the Agent ( if the Agent has decided to post a user profile picture; if the Agent has decided not to share a picture, either the default image is displayed or no image is displayed).The client continues to chat with the Agent by until his included one in their profile. If not, a default image appears..

- The end-user continues chatting until the issue is resolved.
Once the
clientend-user's issue is resolved,
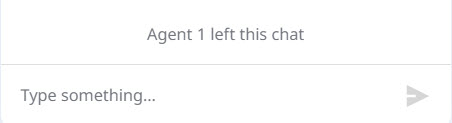
the client clicksthey can click End Chat to exit the chat window. If the Agent leaves the chat first, a message appears in the
clientend-user's chat thread indicating the agent has left the chat
(e.g. “Sophie has left the chat”).
...
.
I
| Info | ||
|---|---|---|
| ||
For information on setting up online reactive chatReactive Chat, see Reactive Chat.
For information on activating reactive chatReactive Chat, see Chat Queue General Settings Tab.
...
- Proactive Chat
- Initiating Proactive Chat
- Reactive Chat
- Chat Queue Options - Chat Queue General Settings Tab
- Chat Queue Options - Treatment Options Tab
- Chat Queue Options - Default Headers and Messages Tab
| Info | ||
|---|---|---|
| ||