...
- Once the Agent is logged into the CCA, they would click on the Menu button located in the top right corner.
- From that drop down menu, select Send Notifications.

Once clicked, a Send Notification dialogue box will open.
- From the Campaign drop down menu, the Agent would select the campaign they want to add the contact to. The Agent cannot create a new campaign at this point, only select from the available options.
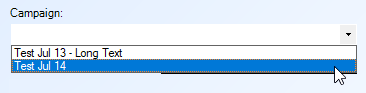
Note: The only options that will be presented to the Agent are the ones that have had the Allow agents to add contacts feature enabled.
The Campaign Details button will open an Outbound Notification Information dialogue box that displays the details of the campaign, such as the name of the campaign, the Active period, and the times the notifications will be sent between.
Once the campaign has been selected, the Send text message to, Send voice call to, and Send email to text fields will be automatically populated with the default information that was entered when the campaign was created. - Enter the name of the new contact in the Contact Name field. Optionally you can click on the
 button located to the right of the Contact Name field to import a contact from the existing Phonebook entries. If the button is clicked the Agent will be presented with the Phonebook.
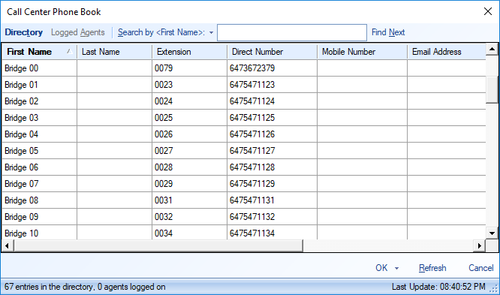
Scroll through the Phonebook until the desired contact is found and click OK at the bottom of the window. If an entry from the Phonebook is selected, the Address fields for each delivery medium will automatically be filled with that contact's information.
Note: The Direct Number will fill the voice call number field, the Mobile Number will fill the text message number, and the Email Address will fill the email to field, if that information has been entered for that contact. - If adding a brand new contact, once the Contact Name has been entered, select the delivery media you want to use to reach the contact by putting a checkmark in the appropriate checkbox(es). In the small field beside the checkbox, enter the text number, phone number and/or email address to deliver the notification to.

Note: If when the campaign was created the Contact Phone number required, Contact SMS required, or Contact Email required were checked off under the Options tab, the contact will not be able to be saved without adding that information.
Optionally, in the text fields for each delivery method, the Agent can change the default message by typing in a new message in the text field. It is important to note that this new message will only be delivered to that specific contact. - When all necessary information has been entered, click OK at the bottom of the window and the new contact will be added to the campaign. You can go back into the ONC Manager and look at the contacts for the campaign you will be able to see the contact the Agent added and the status of the notification delivery.
