Note: Please contact your Service Provider to enable the Create Email feature. If this feature is not enabled for your account, the Create Email option will not appear in the CCA Menu.
You can create and send email from within the CCA. To create and send emails:
- Select Menu > Create Email.
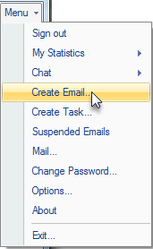
- The Compose Email window opens.
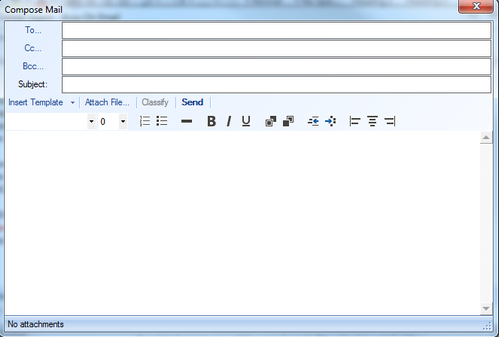
- Type the recipient's name/email address in the To… field. If there is more than one main recipient you wish to send the email to, type all the names.

- If you wish to send a copy of the email to someone, type the recipient’s name in the Cc… field. (optional)
- If you wish to send a blind copy of the email to someone, type the recipient’s name in the Bcc… field. (optional)
- Type the subject of the email in the Subject field.

- Type your message in the blank area at the bottom of the window.

Use the formatting toolbar to apply changes the way your font is displayed.

Toolbar Item
Function
Toolbar Item
Function
Font Drop Down Menu
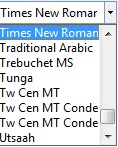
Selects new font for your text. Highlight some or all of the text in your email and select a font from the drop down menu. Only the font selected is changed. Font Size
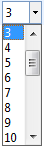
Changes the size of your font. Highlight some or all of the text in your email and select a number from the drop down menu. Only the font selected is changed. Numbered List

Adds a numbered list to your email; numbered lists are used when items in the list occur in sequence:
• To add a numbered list before text is entered, simply click the Numbered List button. A number 1 will appear where the cursor is located in the body of your email.
• To convert paragraph text into a numbered list, highlight the text and click the Numbered List button; the text is converted to a numbered list.Bulleted List

Adds a bulleted list to your email; bulleted lists are used when order of sequence is not important:
• To add a bulleted list before text is entered, simply click the Bulleted List button. A bullet appears where the cursor is located in the body of the email.
• To convert paragraph text into a bulleted list, highlight the text and click the Bulleted List button, the text is converted to a bulleted list.Remove Format

Undoes any formatting you have applied to the text:
• To undo specific formatting, highlight the text where you would like to remove the formatting and click Remove Format.
• To undo all formatting, simply click Remove Format, all formatting is removed from the email.Bold

Applies bolded text to your email. Highlight the text you wish to bold and click B. Italics

Applies italicized text to your email. Highlight the text you wish to italicize and click I. Underline

Applies underlined text to your email. Highlight the text you wish to underline and click U. Font Colour

Changes the colour of your font. Highlight the text you wish to change, and click font colour. The selected font will change to the colour selected. Change Highlight Colour

Highlights text in the selected colour. Highlight the text you wish to apply highlighting to, click Change Highlight colour, select a colour from the colour dialog box, and click OK. The selected text is highlighted in the selected colour. Decrease Indent

Decreases paragraph indentation. Place the cursor at the beginning of the paragraph you wish to change and click Decrease Paragraph Indent. The paragraph will move slightly to the left. Increase Indent

Increases paragraph indentation. Place the cursor at the beginning of the paragraph you wish to change and click Increase Paragraph Indent. The paragraph will move slightly to the right. Align Text

Aligns text to the left, center, or right of the email window:
• Align Left – Click to align text relative to the left margin of the Compose Email window.
• Align Center – Click to align text relative to the center of the Compose Email window.
• Align Right – Click to align text relative to the right margin of the Compose Email window.- Insert templates and/or Add attachments to your email (see Related Articles links below).
- Click Send when you are done composing your email.
Related Articles