Once all the hours and exception dates have been added to the Working Hours Schedule, you can assign the schedule to one or more Queues/Queue Groups or IVRs/IVR Groups. Groups are for selection purposes only, to enable the selection of multiple queues as parameters or assignments or activation. When groups are selected, the group is not the entity that gets selected or deselected, but rather it is the members of that group at the time of selection or deselection that are selected or deselected. For example, if a schedule is applied to a group of queues, the group selects all queues in that group. If the group is modified, the deselection only removes queues in that group at the time of deselection.
Note: Only one schedule can be assigned to any given queue or IVR at a time, therefore if schedules are already applied to your queues or IVRs and you apply new schedules to those same queues or IVRs, the new schedules will replace the old schedules.
- Click Assign, located to the right of the schedule entry.

- The Assign Schedule to IVRs/Queues dialog appears. If you want to assign the schedule to a Queue, click on the Queues tab, if you wish to assign the schedule to an IVR, click the IVRs tab.


- Select one or more Queues/Queue Groups or IVRs/IVR Groups checkboxes to assign the selected schedule to the desired Queues/IVRs.
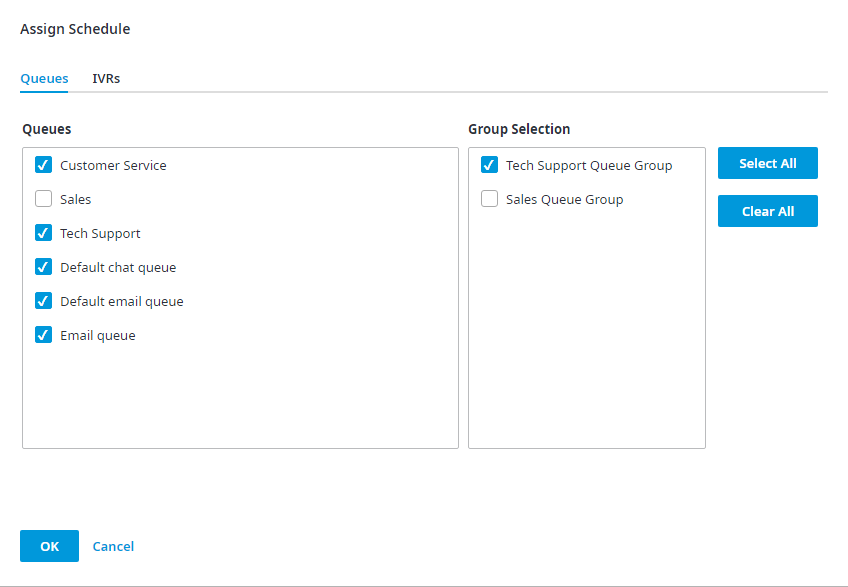

- To assign the schedule to all Queues or all IVRs, click Select All and a checkmark will appear beside each selection. For existing schedules, which have already been assigned to a queue or IVR, you can choose to clear all selections before selecting a new assignment by clicking Clear All.


Note: When making changes to a Queue/IVR Group to which a schedule has been applied to previously, always click Deactivate this bulletin in all queues and then re-select the Queue Group to ensure the queue group changes are updated, otherwise, the queues assigned to the queue group will not reflect the changes made to the selected queue group - The dialog Assign Schedule closes and the status beside the selected schedule changes from "Not in use" to "In use".
- Once a schedule is assigned to a Queue/Queue Group or IVR/IVR Group, a link to the schedule will appear on the Queues page or IVRs page respectively, under the Active Schedule column.

If you would like to view or edit the schedule from the Queues or IVRs page, click on the schedule link and you will be brought to the Working Hours Schedule page, where you can either view or edit the open hours for each of the days.

Notes:
- The schedule will only appear in the Active Schedule column if the schedule has been assigned to a Queue or IVR. The column Active Schedule is only visible if the feature Working Hours by Schedule has been enabled. If this feature is disabled, the column Active Schedule will not be visible from the Queues and IVRs page.
- If no schedule is assigned to an IVR, the IVR is open by default.