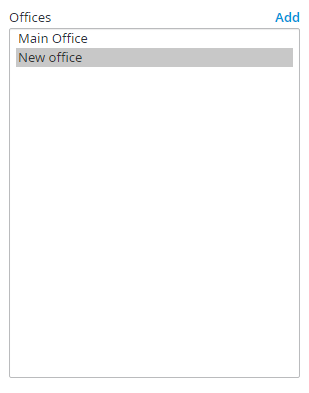
The Offices screen is divided into three sections: Offices, Selected Office, and Office Members. The first section labeled Offices will display a list of all your existing offices in the order in which they were created. The office whose name is highlighted in blue will determine the settings shown below.
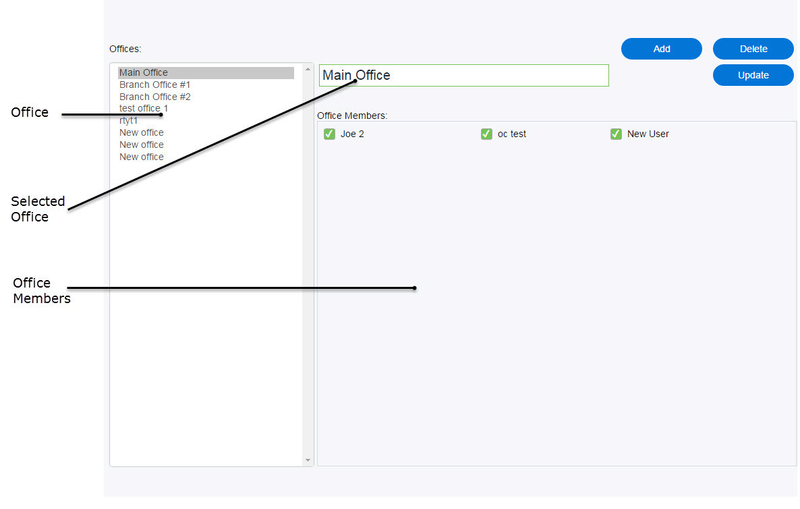
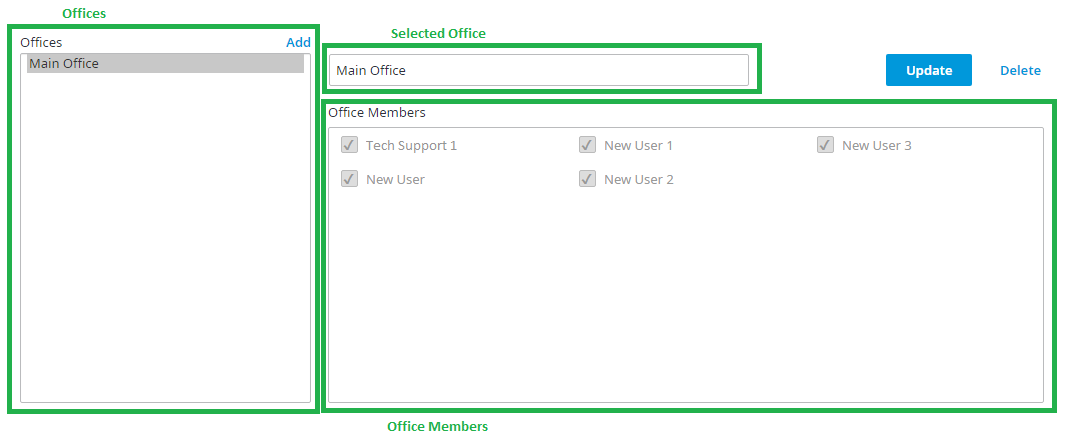
All users must belong to an office, if offices have not been added or configured, the default location of Main Office will be listed with all users as its members.
To create a new office:
- Click Add.

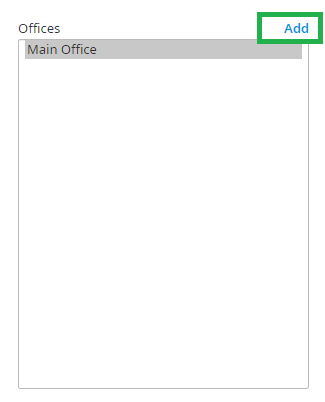
- A highlighted entry named New office is added to the list of offices.
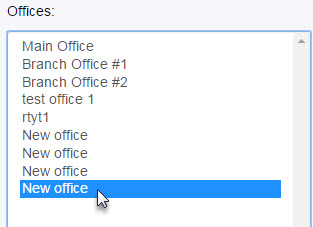
- In the Selected Office field rename your new office.


- With the office still highlighted, use the settings in the Office Members Settings section to configure the office; place a checkmark next to the names of any users you wish to add to this office or re-assign to the office. Click Update to save your changes.
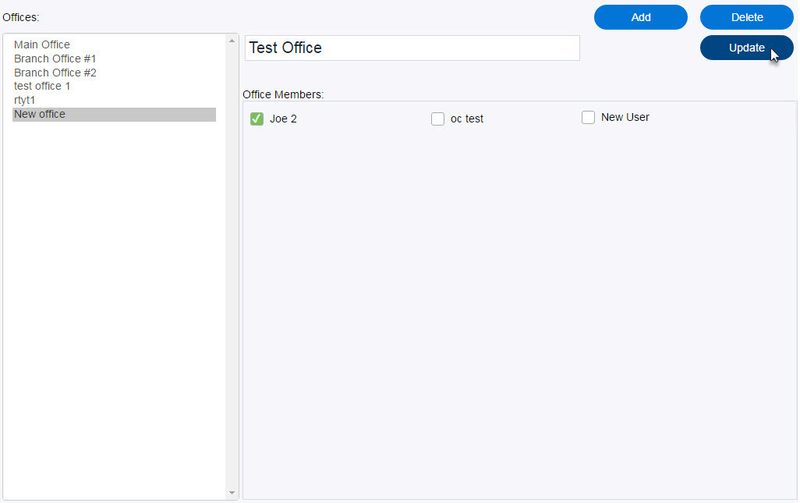
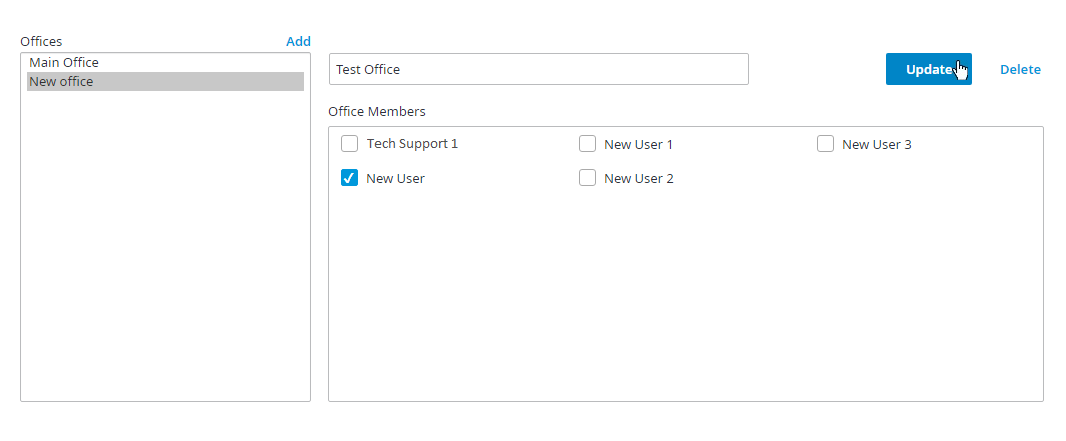
- Click Update to save your changes.
- Your new office is now configured and will be listed as an available location on the Agents screen (see Agents).