...
- Choose a team the external agent will belong to.
- Highlight the team name or any agent within the team.
- Click Add Agent.

- A highlighted entry named New Agent is added to the team. The initial settings for this agent are determined by the team’s default settings.
Note: When an agent is highlighted the following tabs are displayed on the right: General Information, Security, Change Password, and Individual Skills.
- Click on the General Information tab, if not already selected.
- In the First Name field, enter the external user’s first name.
- In the Last Name field, enter the external user’s last name.
- In the Username field, enter a username for the external user; this username will be used when the external user signs into the Client Admin Portal.

Note: All other fields on the General Information tab are optional, and can be completed if desired.
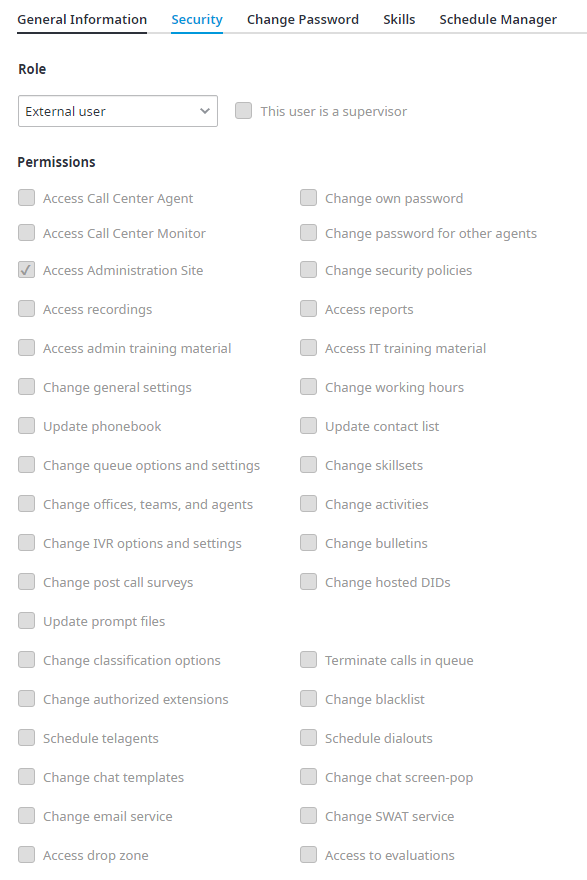
- Click the Security tab.
- From the Role drop down menu, select External User.
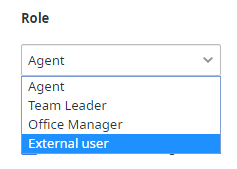
- All Permissions options become greyed out, and all checkboxes are unchecked except for the Access Administration Site checkbox.
- Click the Change Password tab.
- In the New Password field, type a password for the external user; this password will be used when the external user signs into the Client Admin Portal. In the Confirm Password field, retype the password.

- Click Update.

- Next click the Individual Skills tab.
- Here you determine which queue recordings the external user may access by providing access to specific queues. Check the checkbox beside all Queues for which you wish to grant recording access to the external user.

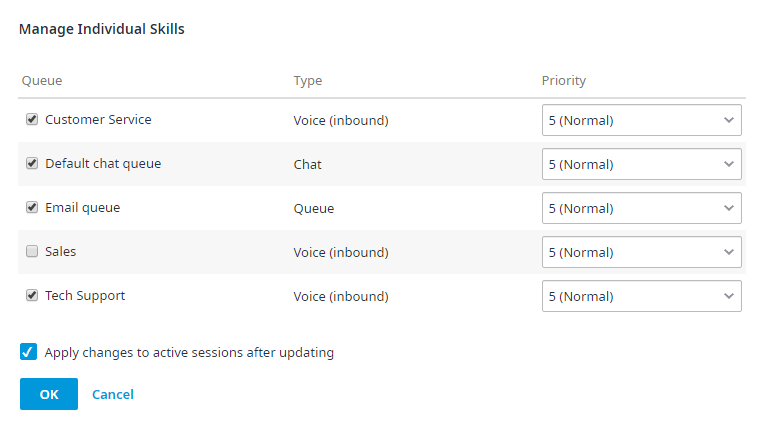
- Click Update.
- The external user can now Sign In to the Client Admin Portal and access all recordings for the assigned queues.

...