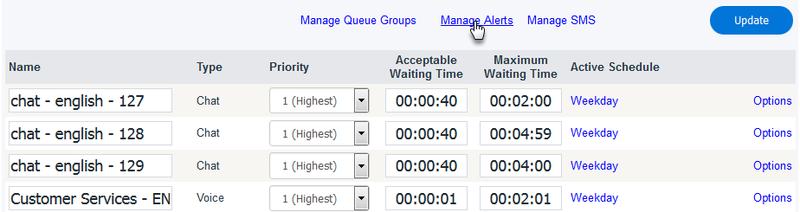
To access the the Manage Alert Settings, locate and click the the Manage Alerts link link found above the column headers on the the Queues page page.
Here you can configure alerts or conditions for each queue listed, different levels of alerts (escalated alerts), and the time period for which each alert is active. The Manage Alerts page consists of three tabs: Conditions, Alert Level, and and Alert Types.
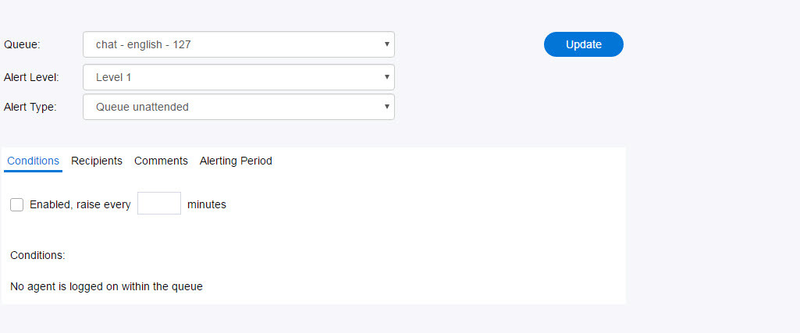
To set up and manage alerts complete the following fields located in the top half of the page:
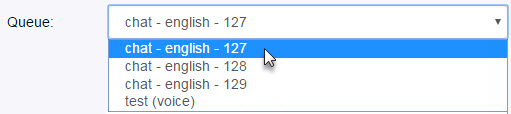
- Queue – Use Use the drop down menu to display the list of available queues and select the queue you wish to enable the alert for.
- Alert Level – For For each alert type you may configure up to three different alert levels, each with their own conditions and recipients (escalated alerts). Level 1 indicates the highest urgency and Level 3 indicates the lowest urgency.

- Alert Type – Indicates Indicates the type of alert set for the queue.
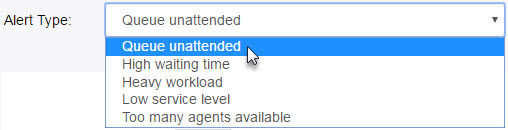
With the exception of the first, each alert type has its own configurable condition:
- Queue unattended – Where Where unattended means no agents are signed in during open hours of operation. When no agents are logged in, an email alert is sent.

- High Waiting time – Where Where high waiting time refers to how long a request has been waiting in queue. Enter a time, in seconds, under the the Conditions: Wait time exceeds [x] seconds. When a request has remained in queue past the time entered, an email alert is sent.

- Heavy Workload – Where Where heavy workload refers to the number of excess items in the queue. When the the number of items in queue exceeds the the number entered in the the Conditions field field, an email alert is sent.

- Low service level – Where Where low service level refers to the percentage by which the service level falls. When the the service level falls below the the percentage entered in the the Conditions field field, an email alert is sent.

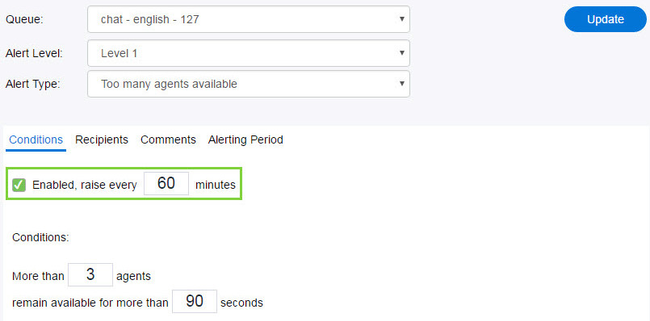
- Too many agents available – Where Where too many agents available refers to the number of agents available for an extended length of time. Enter the number of agents in the the Conditions: More than [x] agents along along with the time, in seconds, for for Conditions: remain available for more than [x] seconds. When the number of agents available exceeds the number entered for the length of time entered, an email alert is sent.

- Enabled, raise every [x] minutes – Select Select the check box to enable alert(s) for the specified queue. The time entered, in minutes, indicates how often alerts are sent.
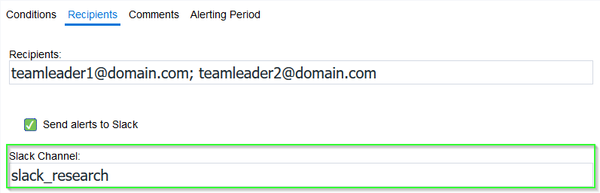
Note: When When an alert is enabled and its condition has been met, the system will send an alert for the time frame specified. Values for alerts should be set according to conditions that do not occur frequently so the alert is not constantly being emailed. - Recipients – Notifications Notifications will be sent to the email addresses entered here. Separate multiple email addresses with a semi-colon ( ; ) or comma ( , ).

Optionally, you can turn on Slack notifications. To set up and configure your Slack settings please see Slack Integration.
- Check the Send alerts to Slack checkbox.
- Define the channel you want to route the notifications to. This must be a valid channel. You may enter the default channel chosen when setting up your webhook, or alternatively, you may enter any other valid channel name to override that setting. (check out your Slack account to view valid channel names) If the space is left blank you will receive an error message. If characters representing an invalid channel name are entered no notifications will be sent to Slack.
- Once you have entered a valid channel name and clicked Update your notifications will be sent to the Slack channel that was entered.
- Comments – A A place to share any notes for other administrators to see; comments are not included in the email notification.

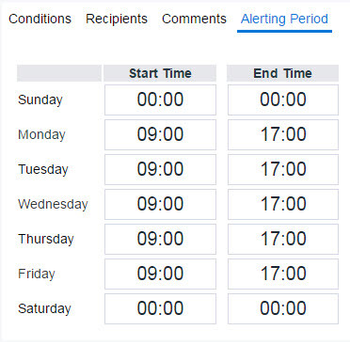
- Alerting Period – Set Set the time frame (Start Time and and End Time) during which alerts will be sent. The alert period can vary from day to day. Use the 24 hour clock when entering start and end times, and the following format format hh:mm.
Note: Always click Always click Update, located in the top right corner to save your changes. If If Update is is not clicked, any new changes made will not be saved.
...