To create a signature template:
4. From the Template Types drop down menu, select the appropriate template type: Content or Signature. Content is for the body of the email while signature is for the signature that will be applied to the end of the email.
5. Click New Template. A New Template window will open.
6. Type a name for your template in Name field.
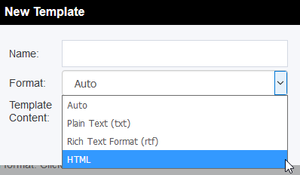
7. Use the Format drop down menu to select the format of the file you are about to upload.

The different formatting options that are available to use are:
8. Click Choose File and locate the file on your computer.
9. Click Open and the name of your file will appear in the New Template window.
10. Click OK to upload the file.
11. Once uploaded, the template will be listed on the Email Templates page. It is now available to all your agents.
12. All existing templates are listed in the table.
13. To review a template, click the View link corresponding to that template. This will download the template in its original format which can be opened in your word processor.