Open the All Reports page and the following five tabs will be displayed: General, Queues, Agents, Call Tracking, and Billing. Every account will begin with the following ten standard executable reports among the five tabs:
| Anchor |
|---|
| _Toc462351768 |
|---|
| _Toc462351768 |
|---|
|
General tab- IVR Overall – summary Summary of IVR activity.
- After-hours Calls – details Details for calls received outside of regular office hours.
- Unanswered calls – details Details for abandoned calls.
| Anchor |
|---|
| _Toc462351769 |
|---|
| _Toc462351769 |
|---|
|
Queues tab- Daily Queue Productivity – daily Daily statistics of queue activity.
| Anchor |
|---|
| _Toc462351770 |
|---|
| _Toc462351770 |
|---|
|
Agents tab- Daily Agent Activity – specific Specific agent activity per day.
| Anchor |
|---|
| _Toc462351771 |
|---|
| _Toc462351771 |
|---|
|
Call Tracking tab- Call Tracking –- with grouping – details Details for every call handled by the IVR/DNIS along with Classification Information if available.
...
- Daily Concurrent Sessions Peak – highest Highest number of concurrent sessions.
- Dialout Billing – billing Billing information for calls placed outbound.
- Inbound Billing – billing Billing information for calls received inbound.
Every report can be conducted for a user-specified time period.
To generate a report immediately:
- Select one of the five Tabs and click on a Report link.
- The corresponding page will open where parameters can be entered for generating the report.
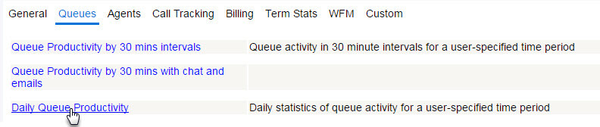
- Each report will have its own set of parameters. The Daily Queue Productivity report is used here as an example. For more information on other reports, please contact your service provider.
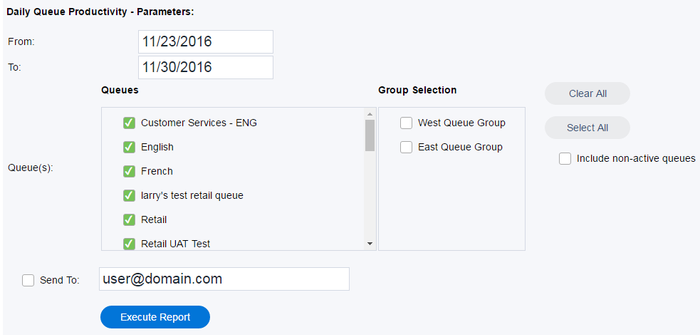
- Enter a date range in the From: and To: fields. Times can optionally be added to your date range. Use the following format: mm/dd/yyyy hh:mm:ss.
- Specify which Queue(s) or Queue Groups you wish to generate the report for. Next to each queue listed, you may place a checkmark or use the Select All and Clear All buttons to the right for quicker selecting. Groups are for selection purposes only, to enable the selection of multiple queues as parameters or assignments or activation. When groups are selected, the group is not the entity that gets selected or deselected, but rather it is the members of that group at the time of selection or deselection that are selected or deselected. For example, if a report is applied to a group of queues, the group selects all queues in that group. If the group is modified, the deselection only removes queues in that group at the time of deselection.
Note: When making changes to a Queue Group to which a custom filter has been applied to previously, always click Deactivate this bulletin in all queues and then reselect the Queue Group to ensure the queue group changes are updated, otherwise the queues assigned to the queue group will not reflect the changes made to the selected queue group
- To see queues in the list that are no longer active, place a checkmark in the box labeled Include non-active queues found on the right side.
- Optionally place a checkmark in the box labeled Send To: and enter any email addresses to the right to send a copy of the PDF report you're about to generate.
- Once you have finished entering all the parameters, click Execute Report.
See Accessing a Report for information on viewing and accessing generated reports.
Once you have executed a report, the My Reports page opens. Located under Reports, the My Reports screen resembles a print spooler, showing which reports have been queued to be generated, and which are ready for display.